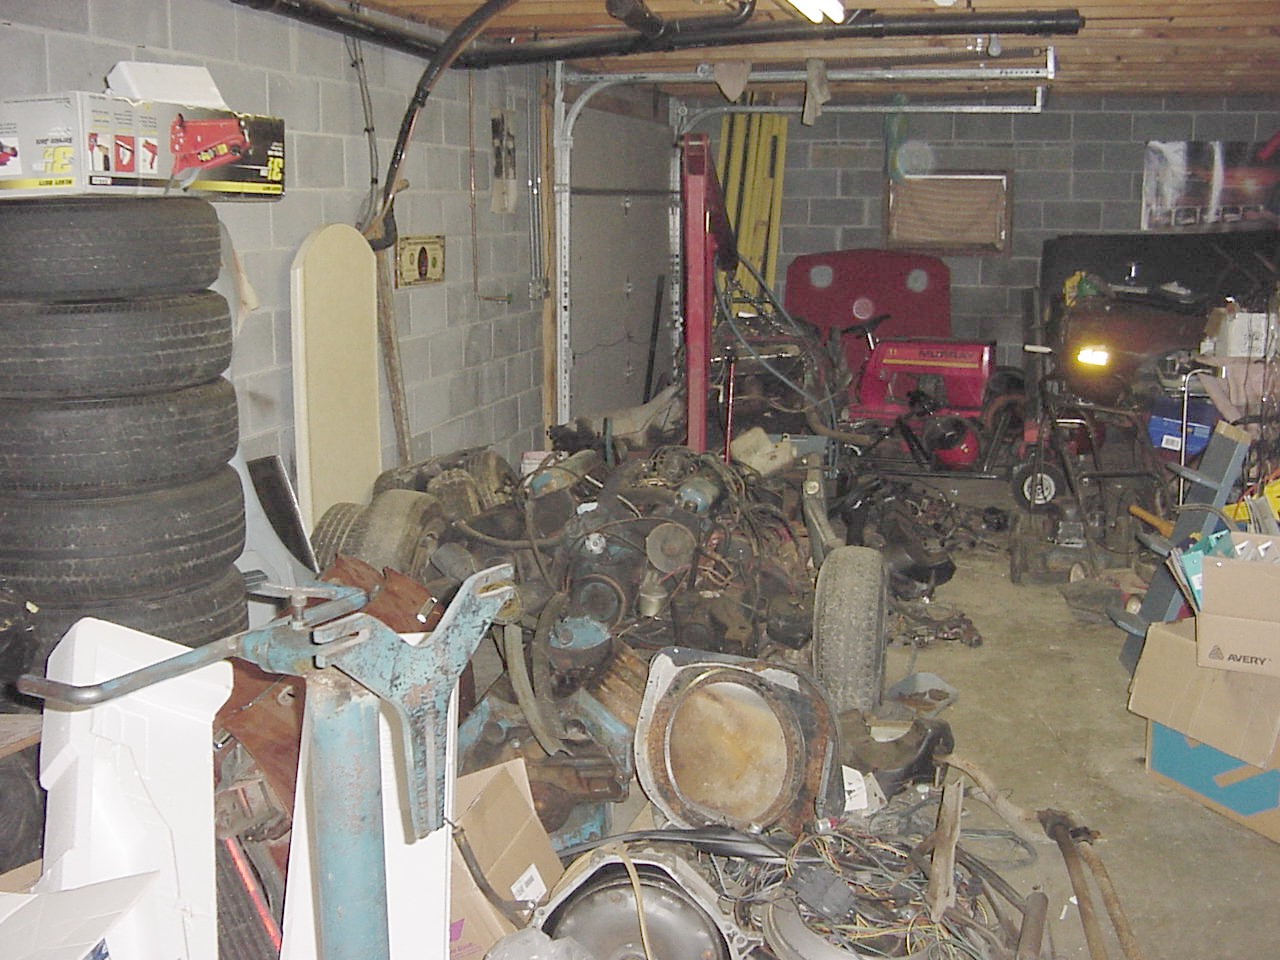
| When Joe and I started buying Trans
Am parts cars four years ago, I didn't think I'd run out of room in my
basement... but as you can see, the parts are piling up!! The Red
Baron Trans Am project and the 1966 Ford truck project are also taking up
most of my indoor floor space now so parting Trans Ams out is now done
outside... |
 |
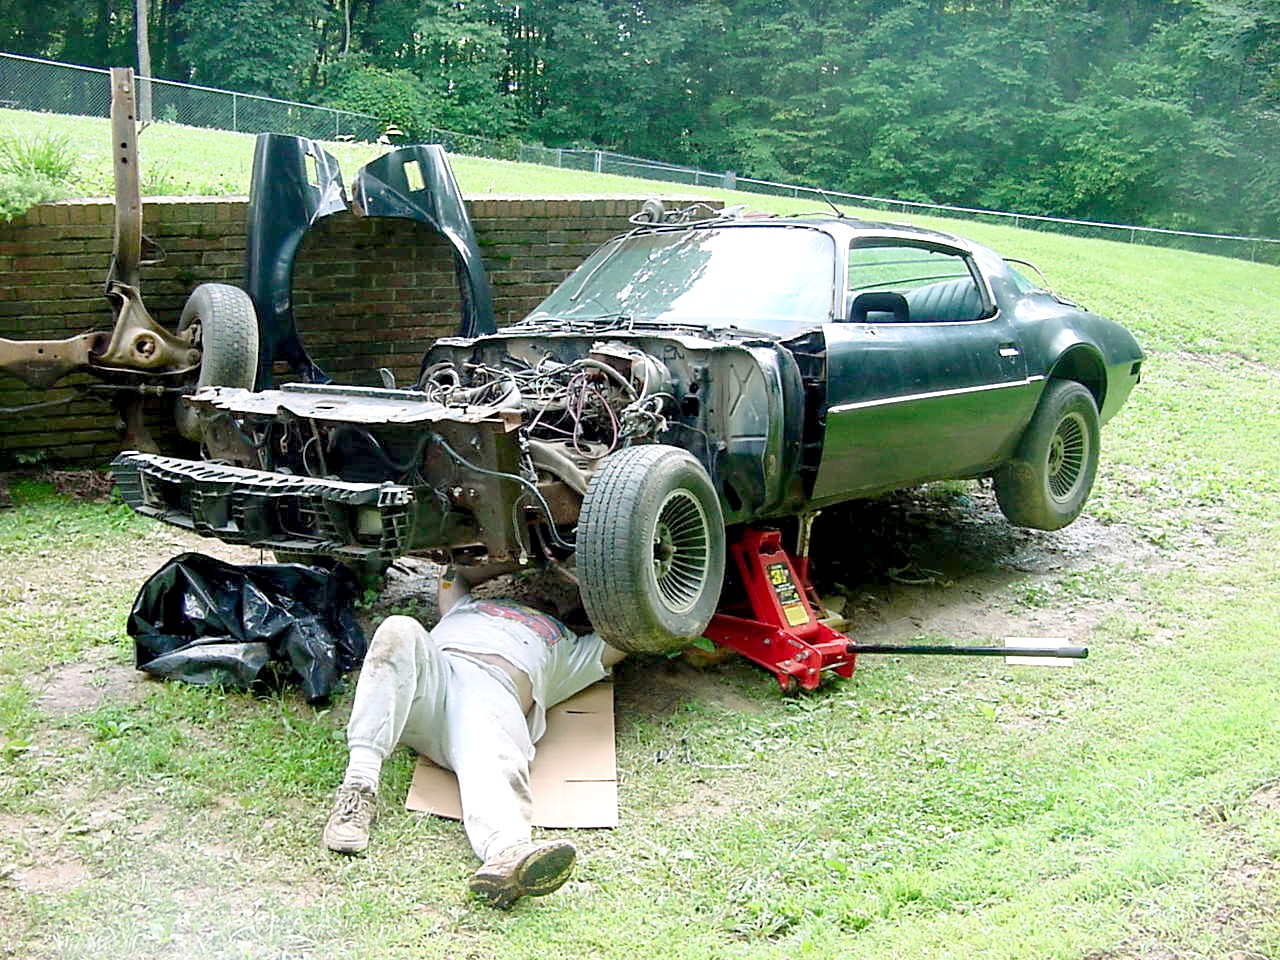
| Which wasn't too bad until the Lord
decided to bless us with a very wet spring and summer. So now, I'm
lying in the MUD parting out Trans Ams which isn't much fun... kinda like
being in the junkyard... |
 |
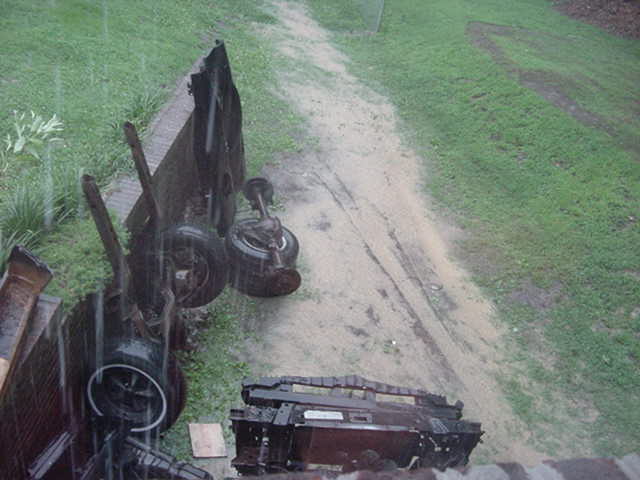
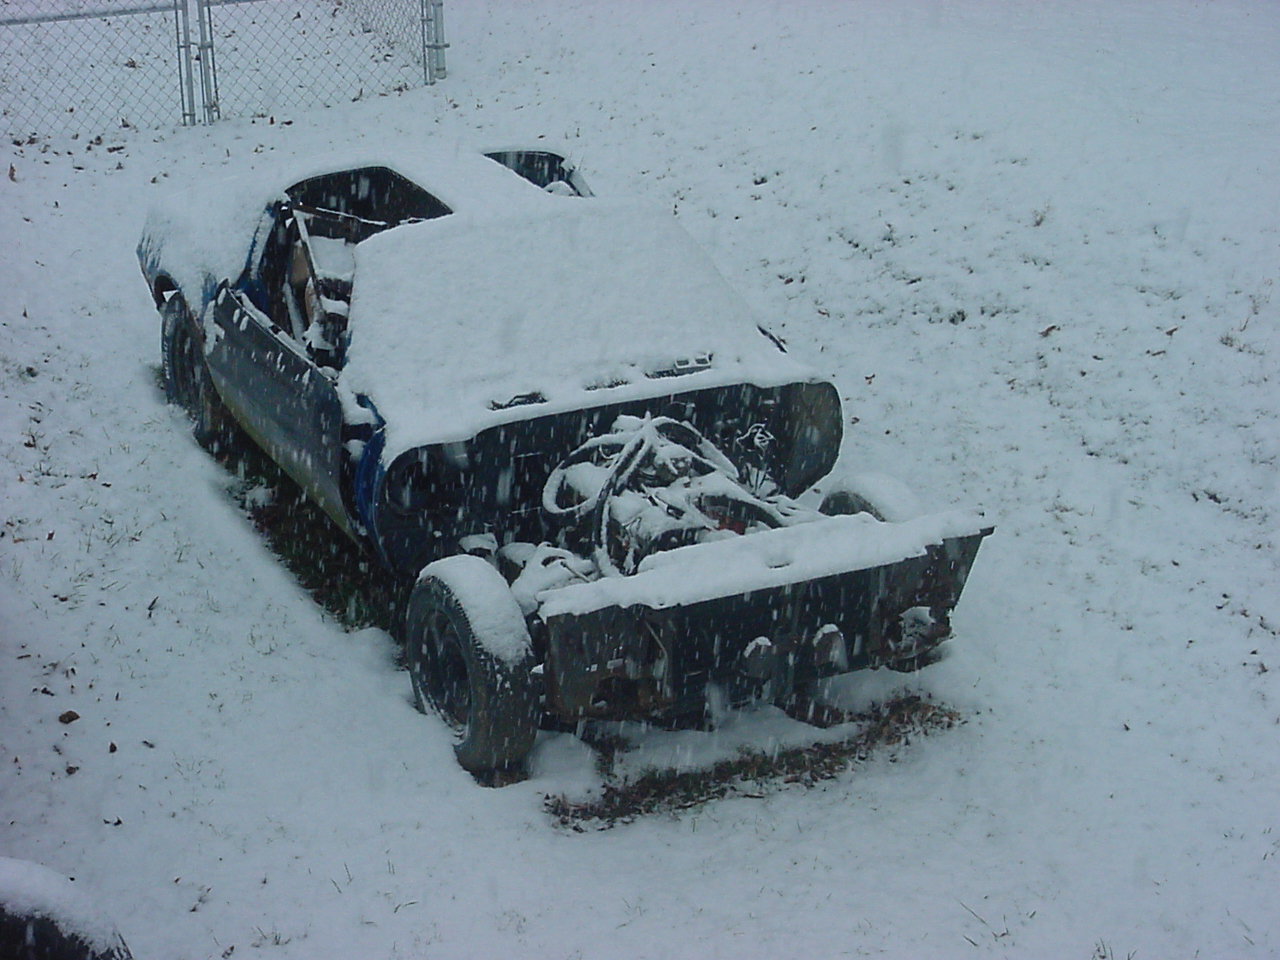
| But when it's doing this outside,
it's really not a good place to part out a Trans Am!! |
 |
| This is also not the kind of
weather you want when trying to part out a Trans Am outside.... |
 |
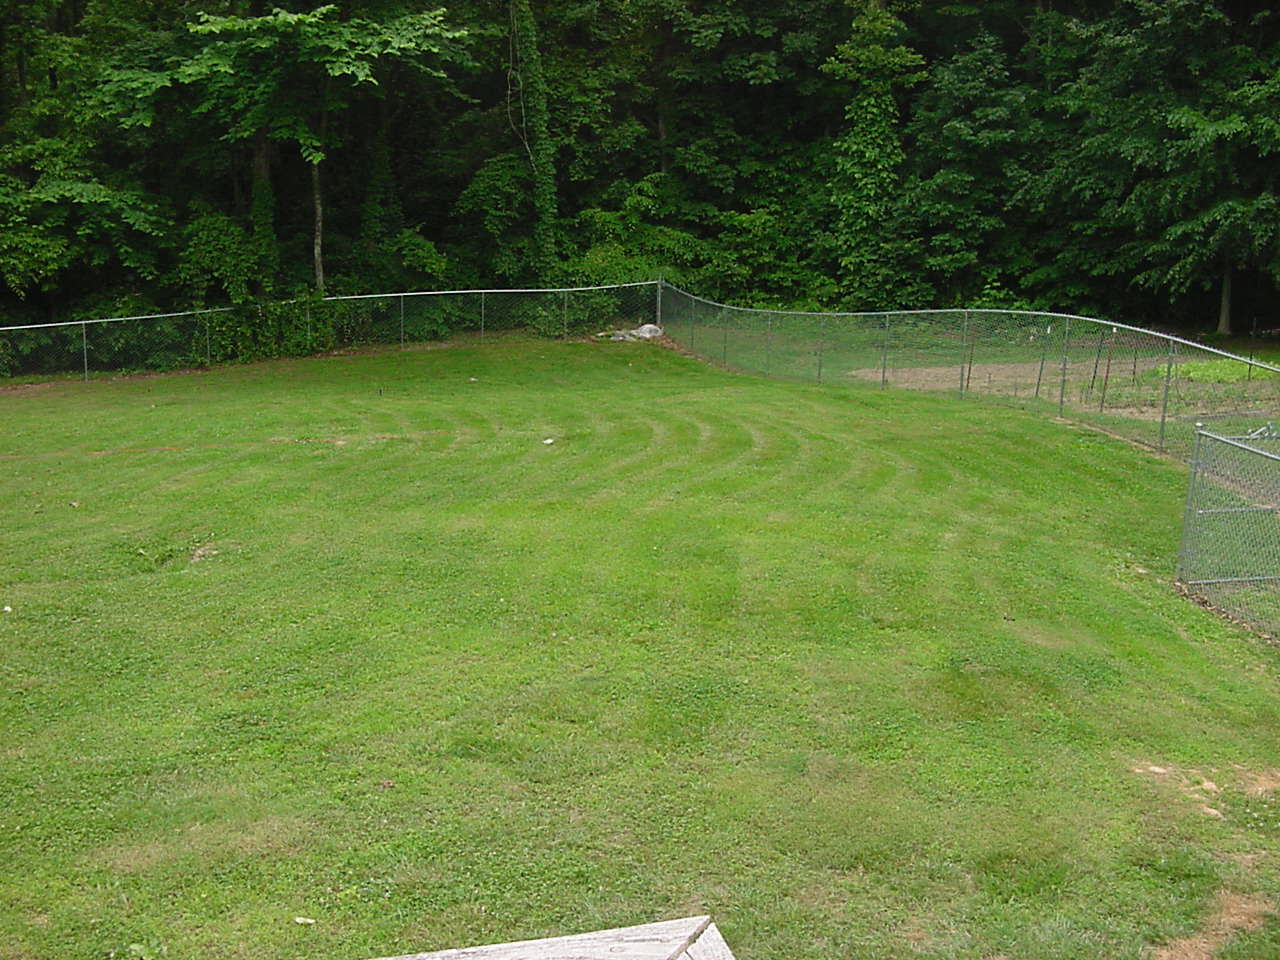
| Here's a nice spot in the backyard
just begging to have a nice detached garage constructed on it!! |
 |
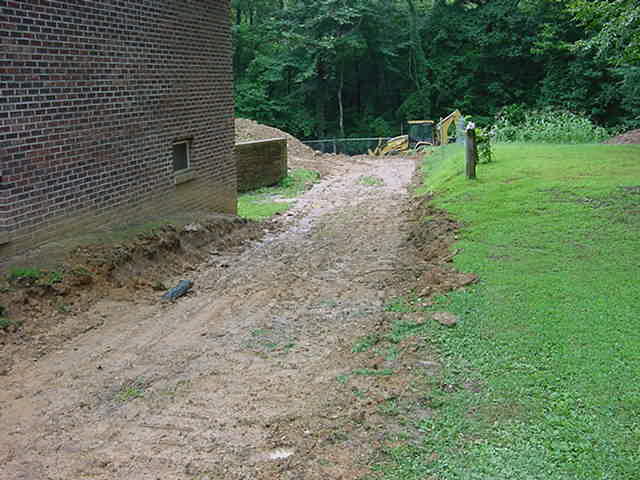
| They've started excavation for the
garage foundation and the new driveway, but it's raining so much that they
can't get much work done!! |
 |
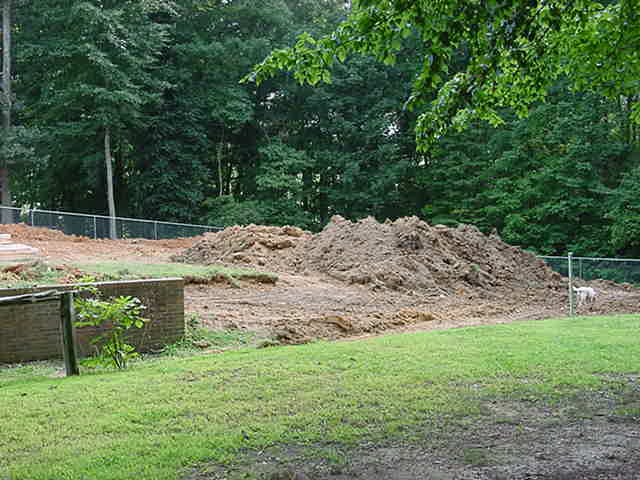
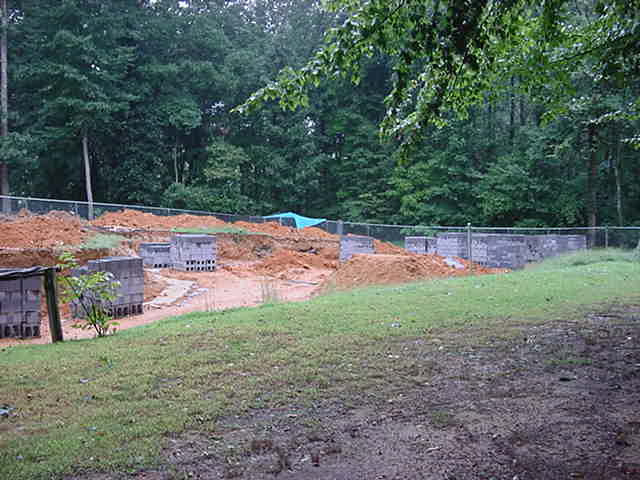
| So all I've got right now is a pile
of dirt... |
 |
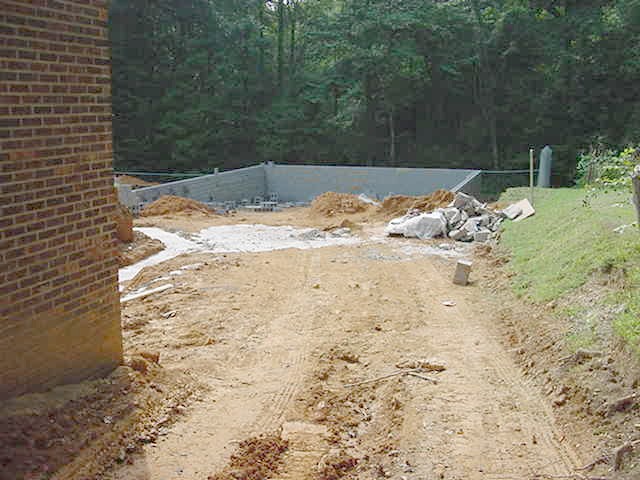
| Update#1!! Even though you
can't tell it by these pictures... it dried out long enough for the footers
to be dug out, concrete poured, and the block delivered!! Then it
started raining again!! |
 |
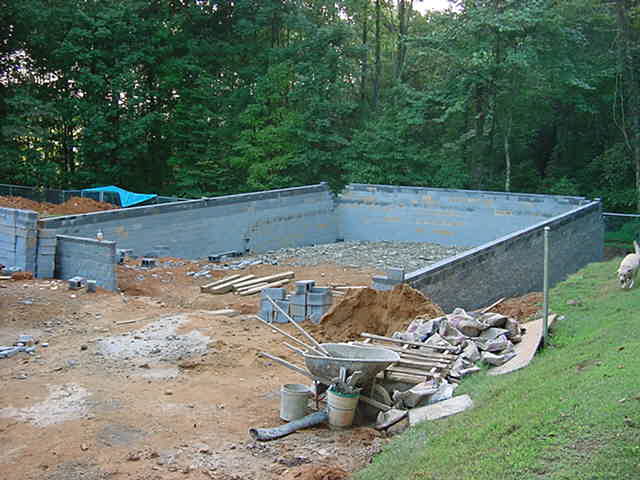
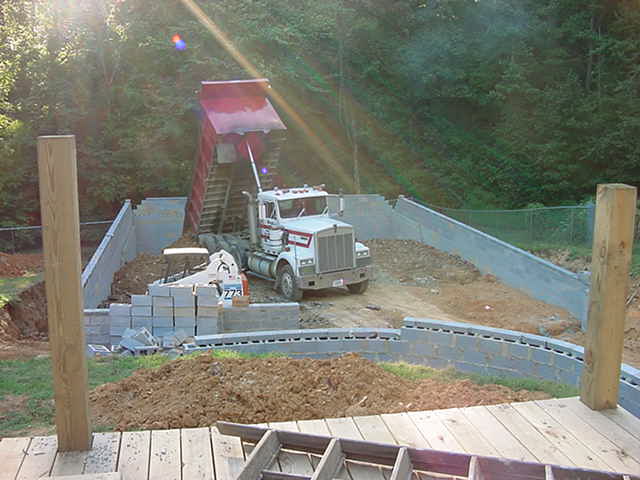
| Update #2!! Well the rains
have stopped and we're having some nice weather... so you can see the block
work is well underway!! There's still three more courses of block to be
laid on these walls plus construction of the front wall... then the blocks
will be pumped full of concrete and rebar. Then it will be backfilled
and compacted until only two feet of block wall is above the finished
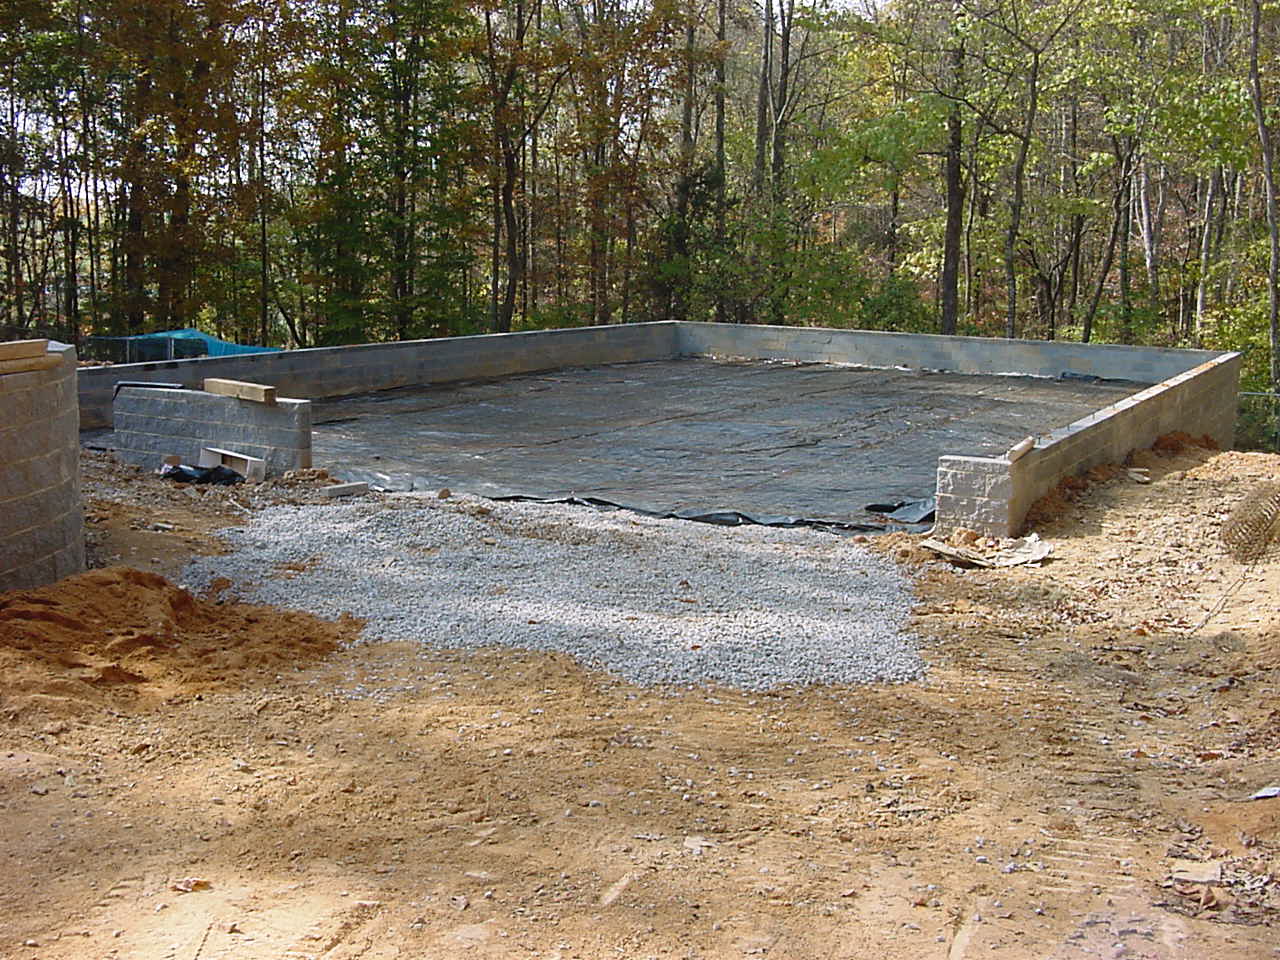
concrete floor. You can see the footer for the new retaining wall too. |
 |
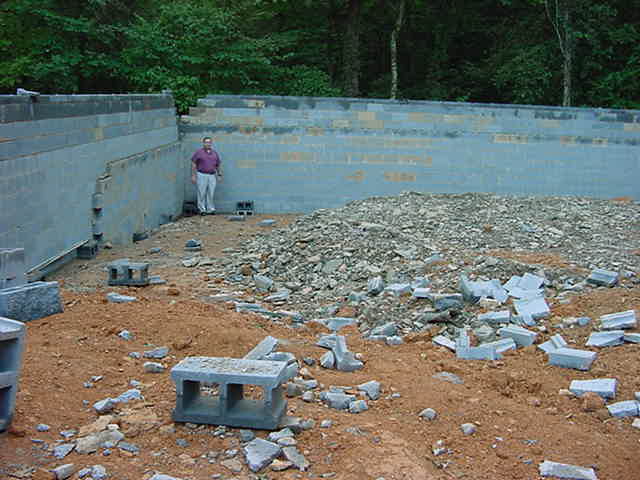
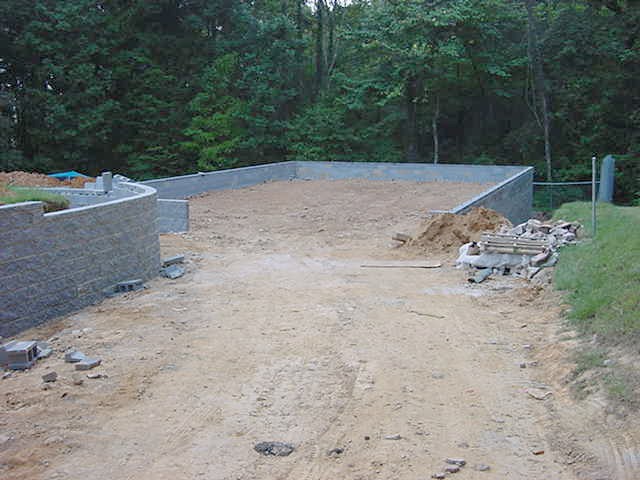
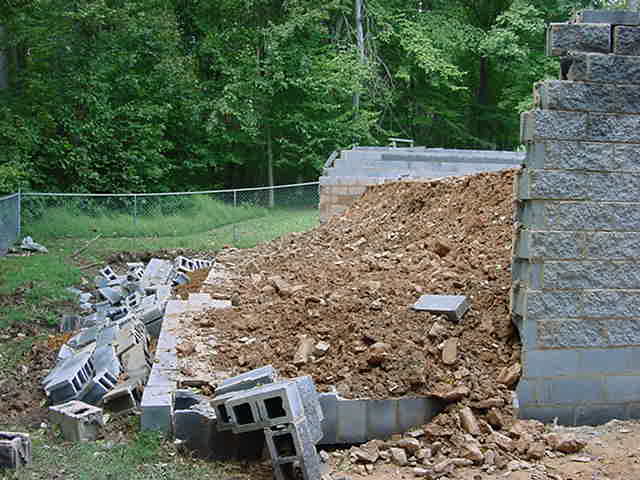
| Update #3!! The blocks have
been pumped with concrete and rebar. The last three courses of block
are on except for the corners. We're ready to backfill and compact!!
You know, it really doesn't look that big... |
 |
| But this kinda puts it in
perspective!! I know, I know, you're thinking why don't I put a
basement in this thing... can you spell "limited budget"?
Plus you should see my house... oh I didn't tell
you that we've also completely ripped the house apart and doing a complete
remodeling job!! |
 |
| Update #4!! Backfilling is
now underway. Do you notice a problem with this picture... don't
worry, I didn't when I took it... but you'll soon see... |
 |
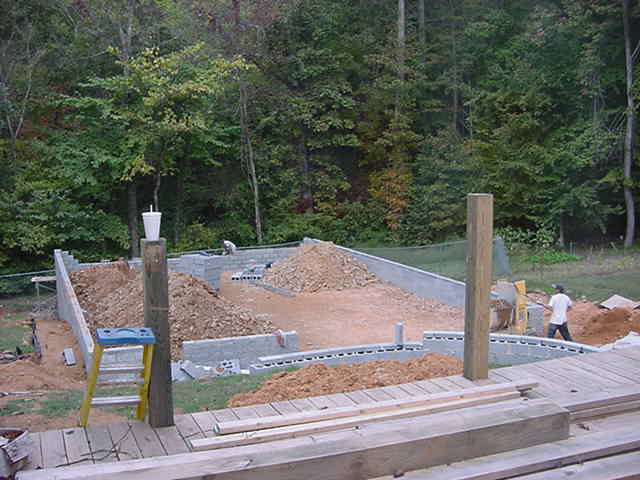
| Backfill complete. Masonry
complete. New retaining wall is almost complete. All I need now
is some gravel and some concrete for the floor. Life is good... right? |
 |
|
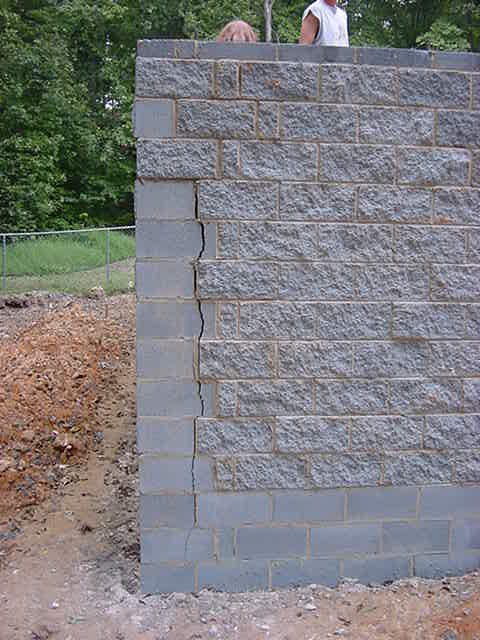
WRONG!!
Setback #1: Now you can see
what was wrong in the picture above. Dumping all of that backfill
right up against the back wall caused this HUGE crack to appear on BOTH rear
corners where the back wall and the side walls some together. Can you
believe the masons actually came in and laid the corner blocks on top of
these cracks?? SHEESH!! I was initially willing to live with the
screwed up mixture of smooth and cut-face block, but now I don't have to.
The width of this crack was 1/2".
What am I gonna do? Excavate the backfill
along the back wall and corners, cut the corners completely out, and have
new cut-face block laid with more rebar and concrete. |
 |
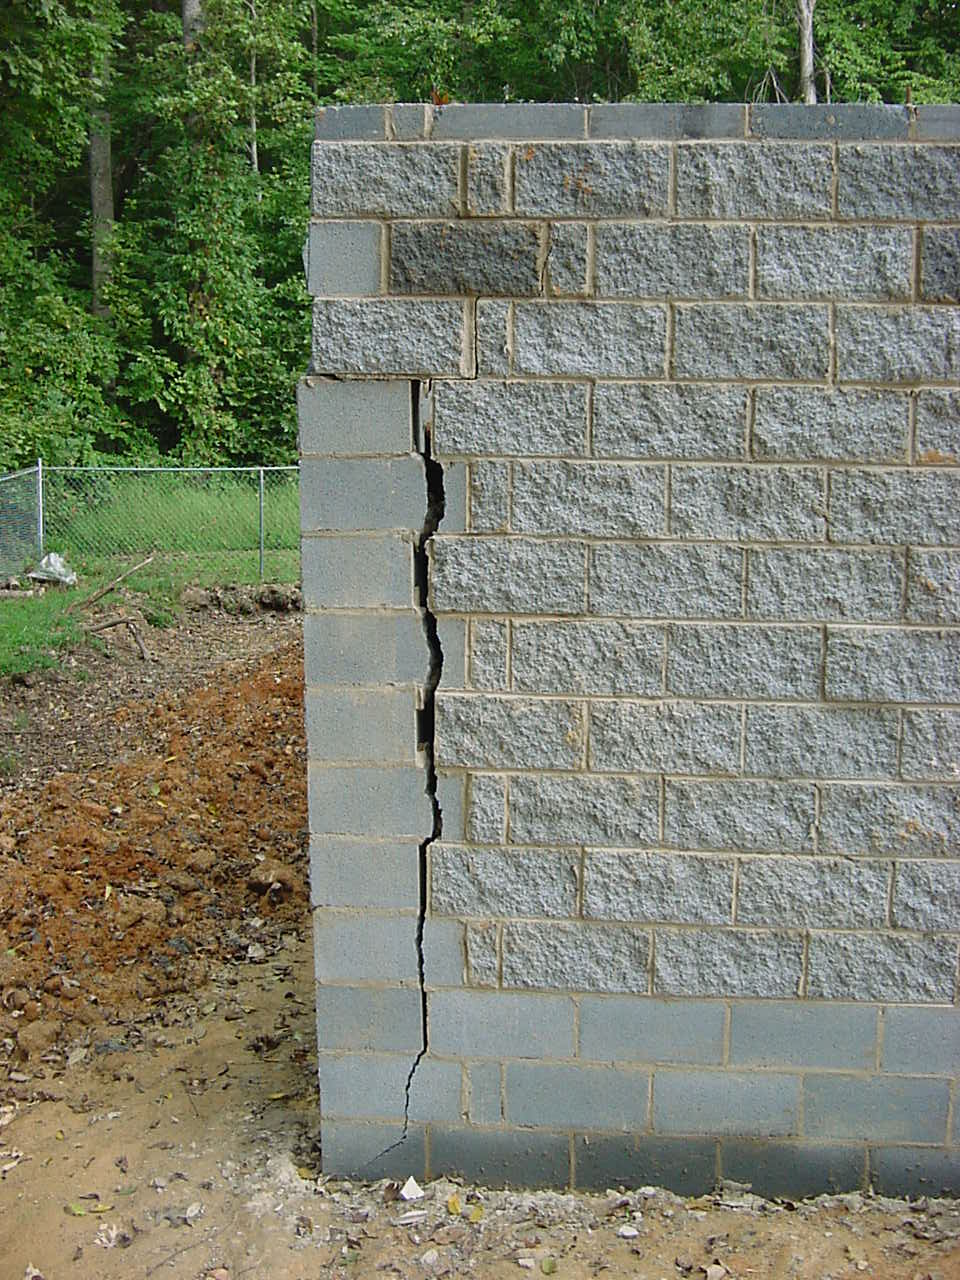
| While waiting on the excavators to
haul in their equipment to repair the corners... it began to rain and the
back wall began to move...now my 1/2" crack is a 2" crack... this is getting
BAD... |
 |
| But if you thought the picture above
was BAD... this is REAL BAD!! Well, the excavators won't have to be
careful while digging out the back wall because it is already lying on the
ground!! The revised plan now is to clean
up this mess and start over with a new back wall and tie it into the
existing side walls.
The timeframe from finding the 1/2" crack to
this was exactly one week... |
 |
| Update #5: Enough of seeing
the back wall lying on the ground!! We've cleaned up the mess and
almost complete rebuilding the back wall better than before... At
least the kids had fun playing on those big dirt piles until they completed
the backfill... again. |
 |
| Can you see all of that rebar
sticking up in the air? It will be bent over and poured into the
concrete slab... hopefully in the near future!! |
 |
| Update #6: Here it is with
the backfill complete and the walls are all intact!! Kinda appropriate
to have those rays of sunlight shining down on it... don't ya think?? |
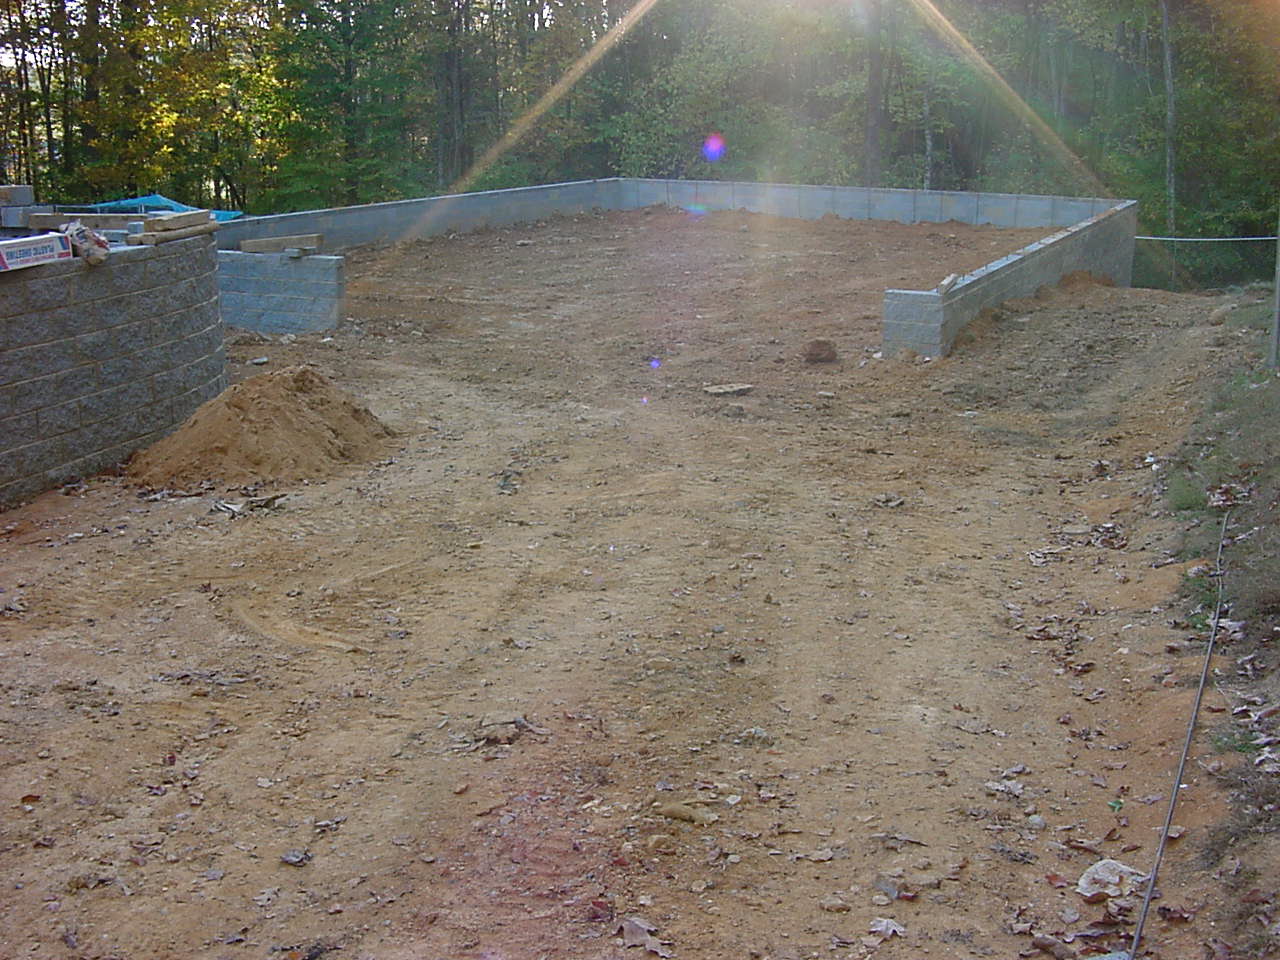 |
| Update#7: OK, now things are
actually moving FORWARD now... we have 4" of gravel, a layer of black
plastic, and a covering of 6"X6"X1/8" wire mesh AND some No. 3 rebar!! |
 |
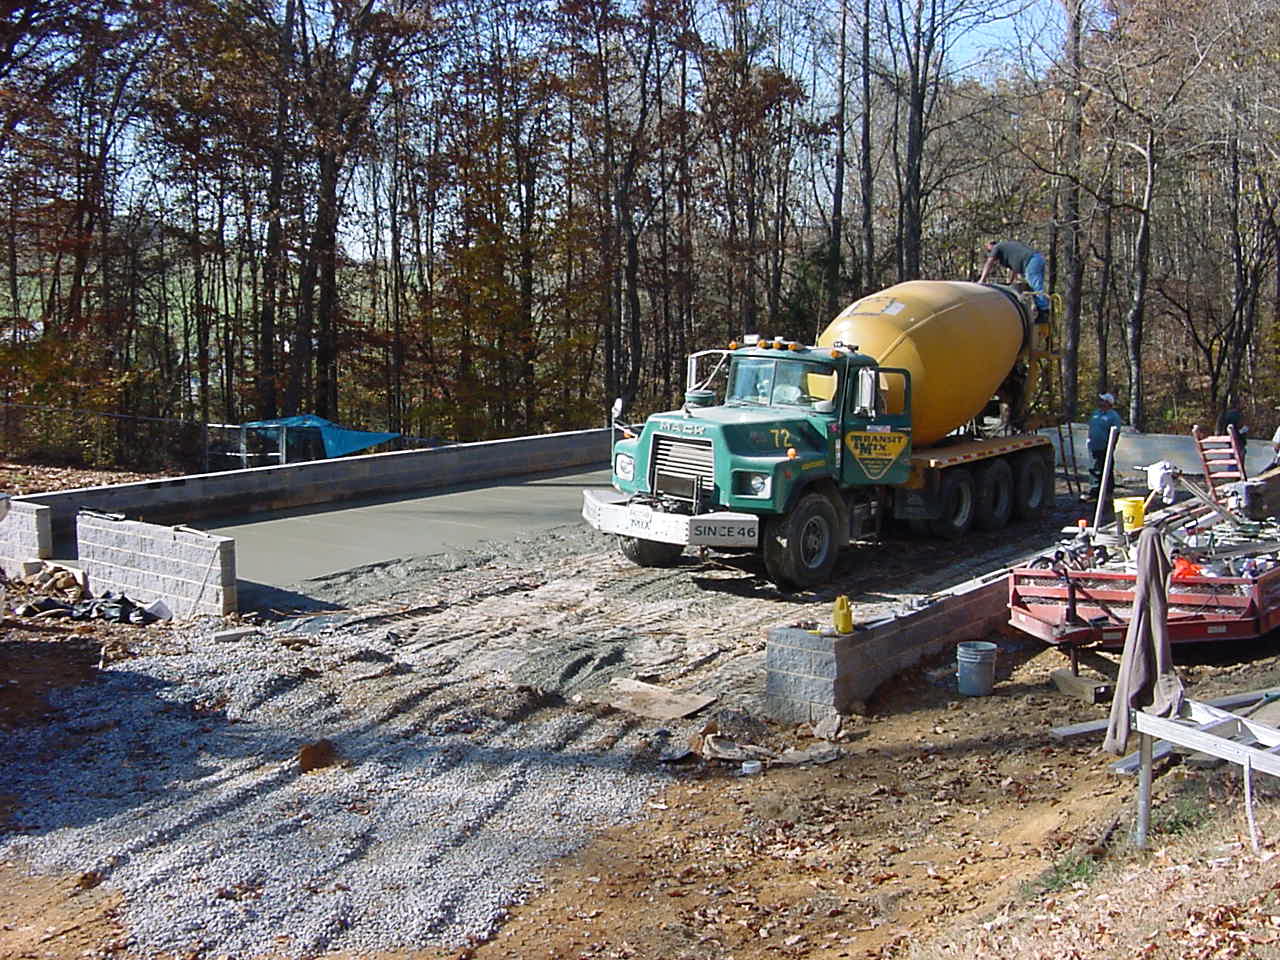
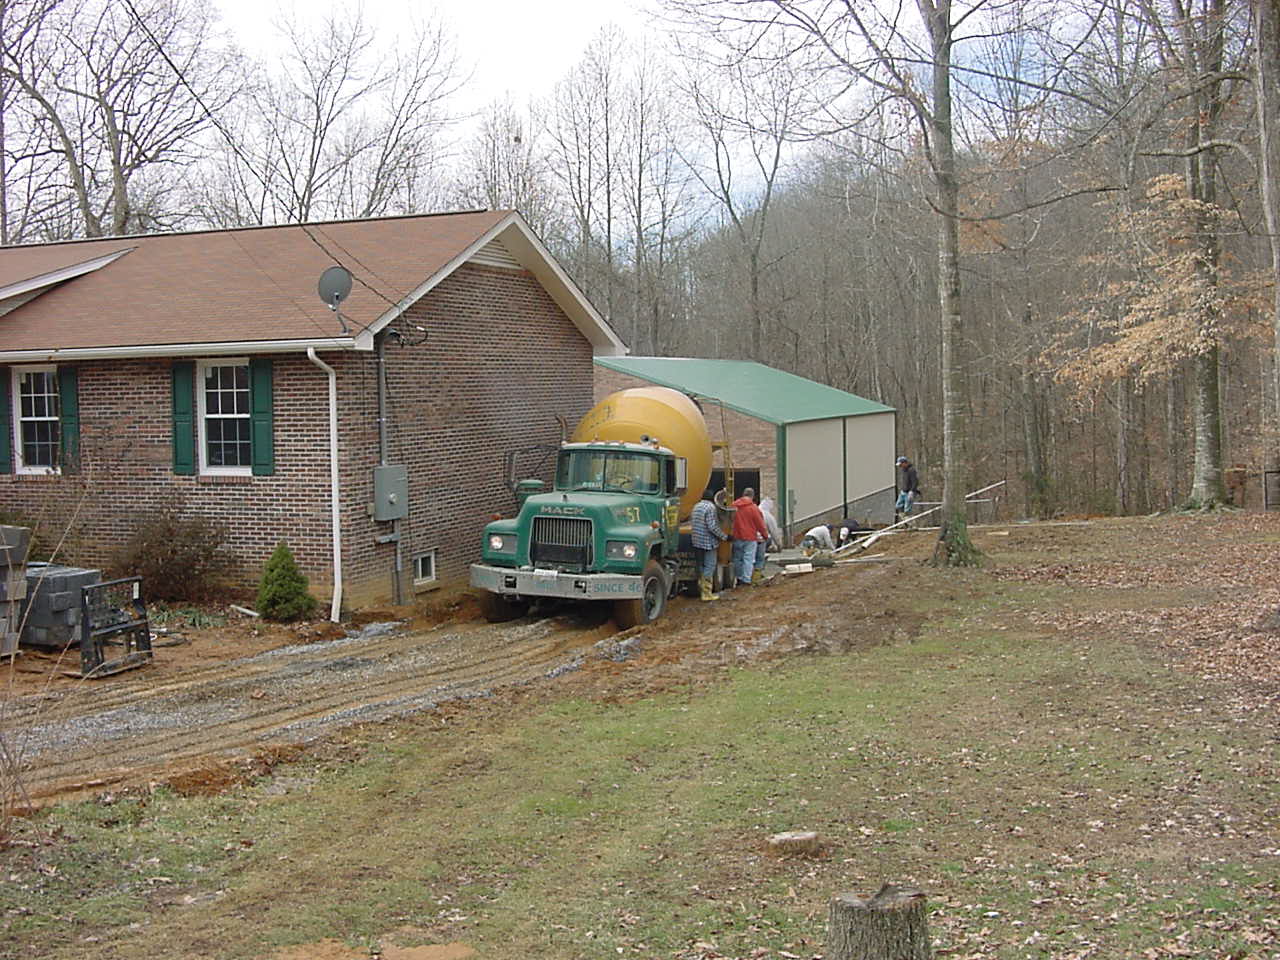
| Oh yeah!! The concrete trucks
have arrived!! It took five of these babies to pour a 6" thick slab of
4000 psi concrete. |
 |
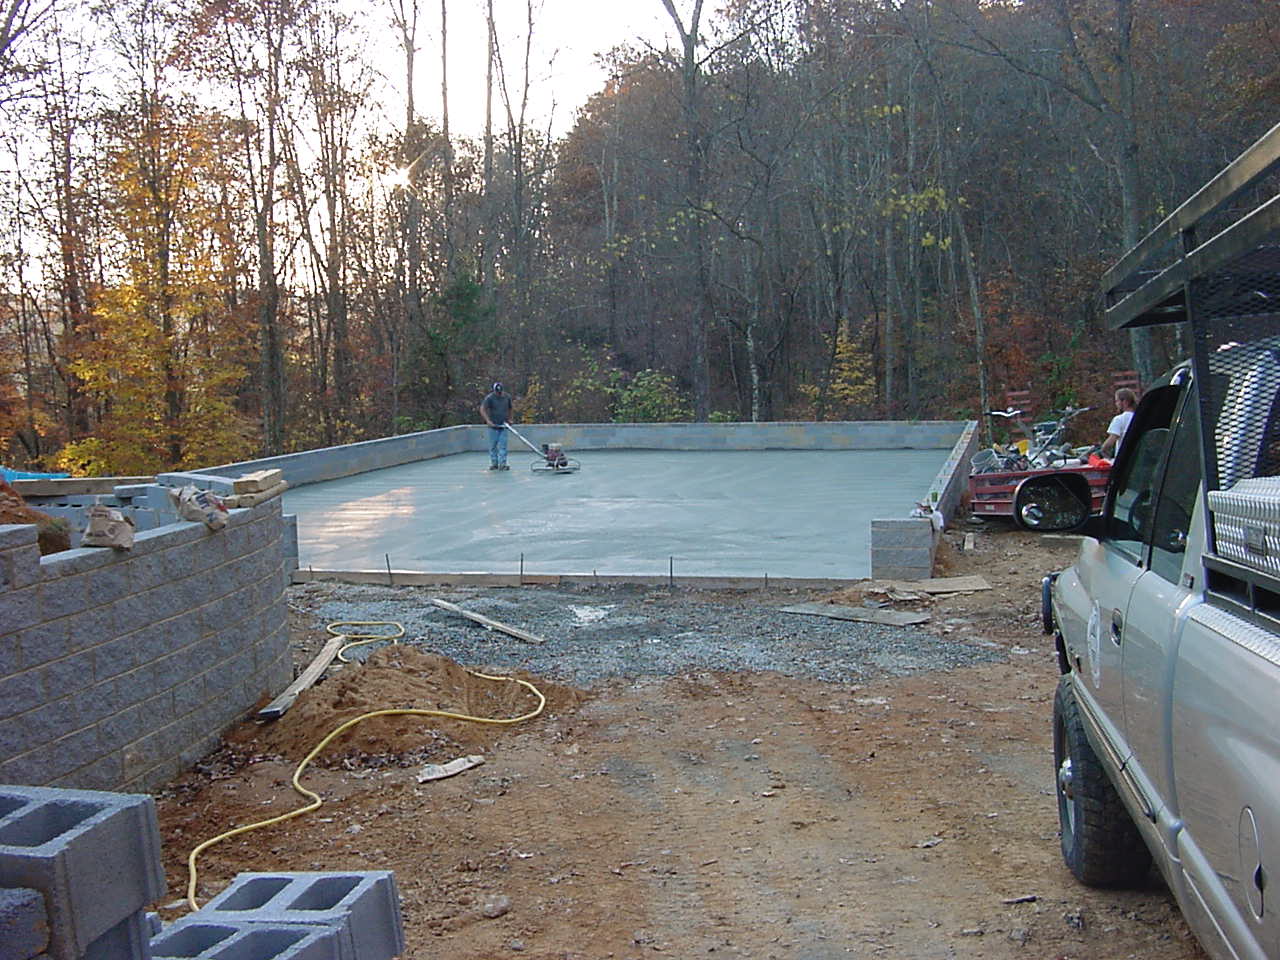
| Putting the finishing touches on
the brand spanking new concrete floor. I can't wait until the concrete
has fully set up!! Next step is getting the building constructed!!
As you can tell, the leaves have turned and are falling... so it has been
SEVERAL months to get to this stage... |
 |
| Update #8: Yes, those are
walls going up!! This project is starting to pick up speed now!!
No, these are not the typical Posteel walls, these are stud walls like you
have in your house. |
 |
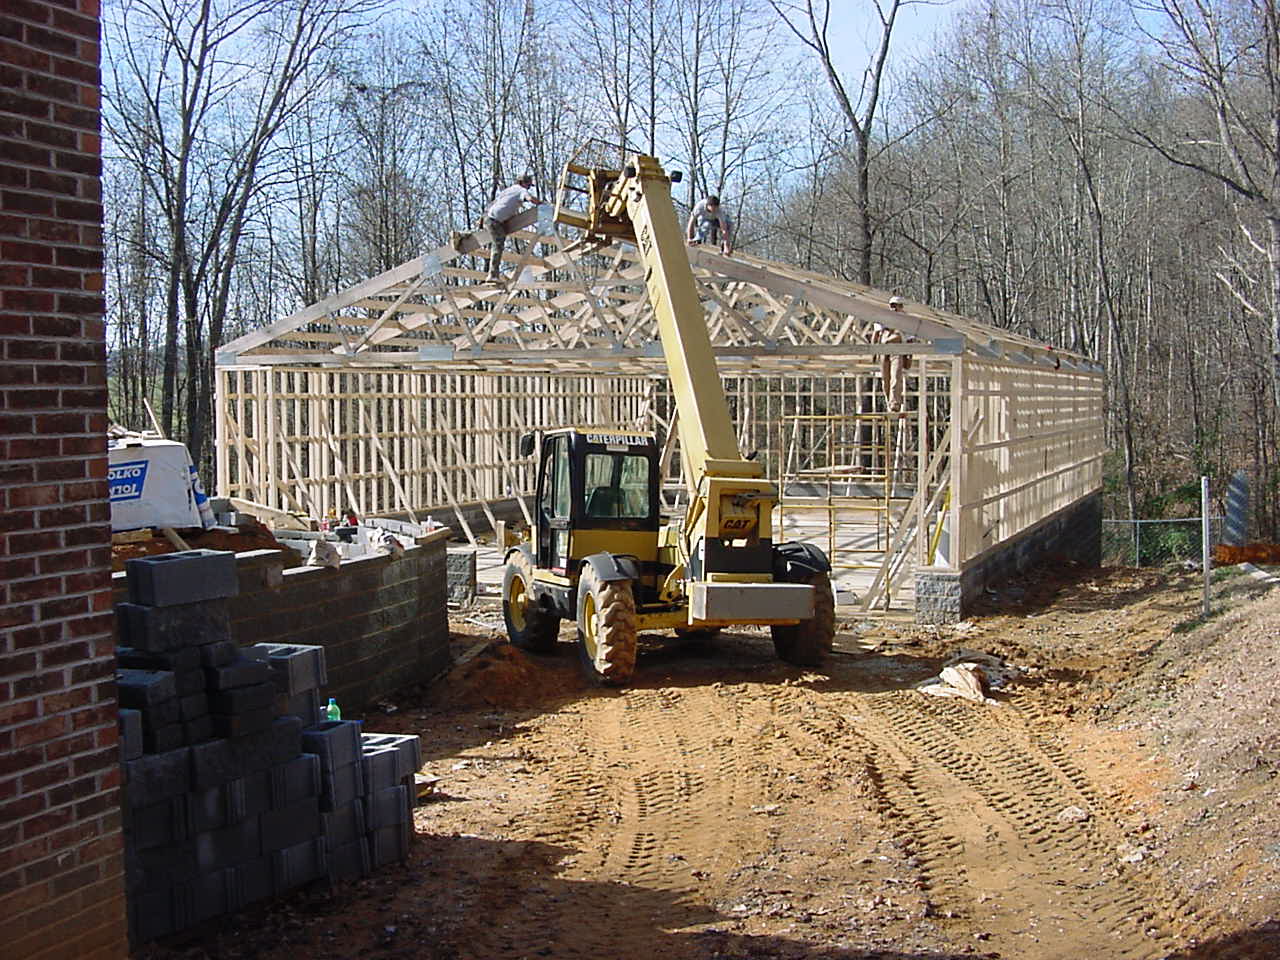
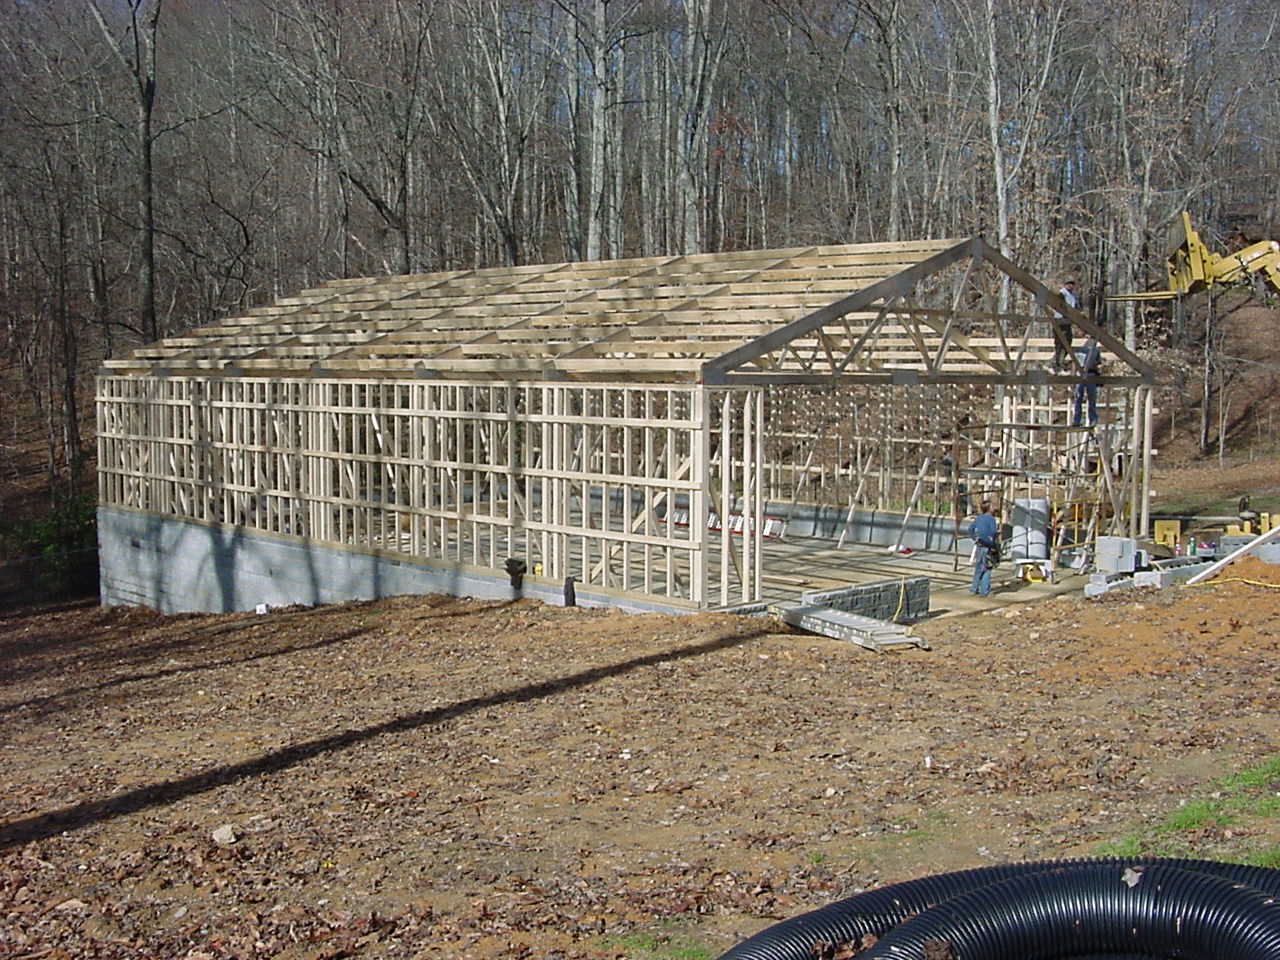
| Here's the last of the trusses
being set into place. Now the front wall needs to be framed up and
start putting the roof and siding on it!! The trusses are typical
Posteel design and sit on 10' centers with framing members between each
truss. |
 |
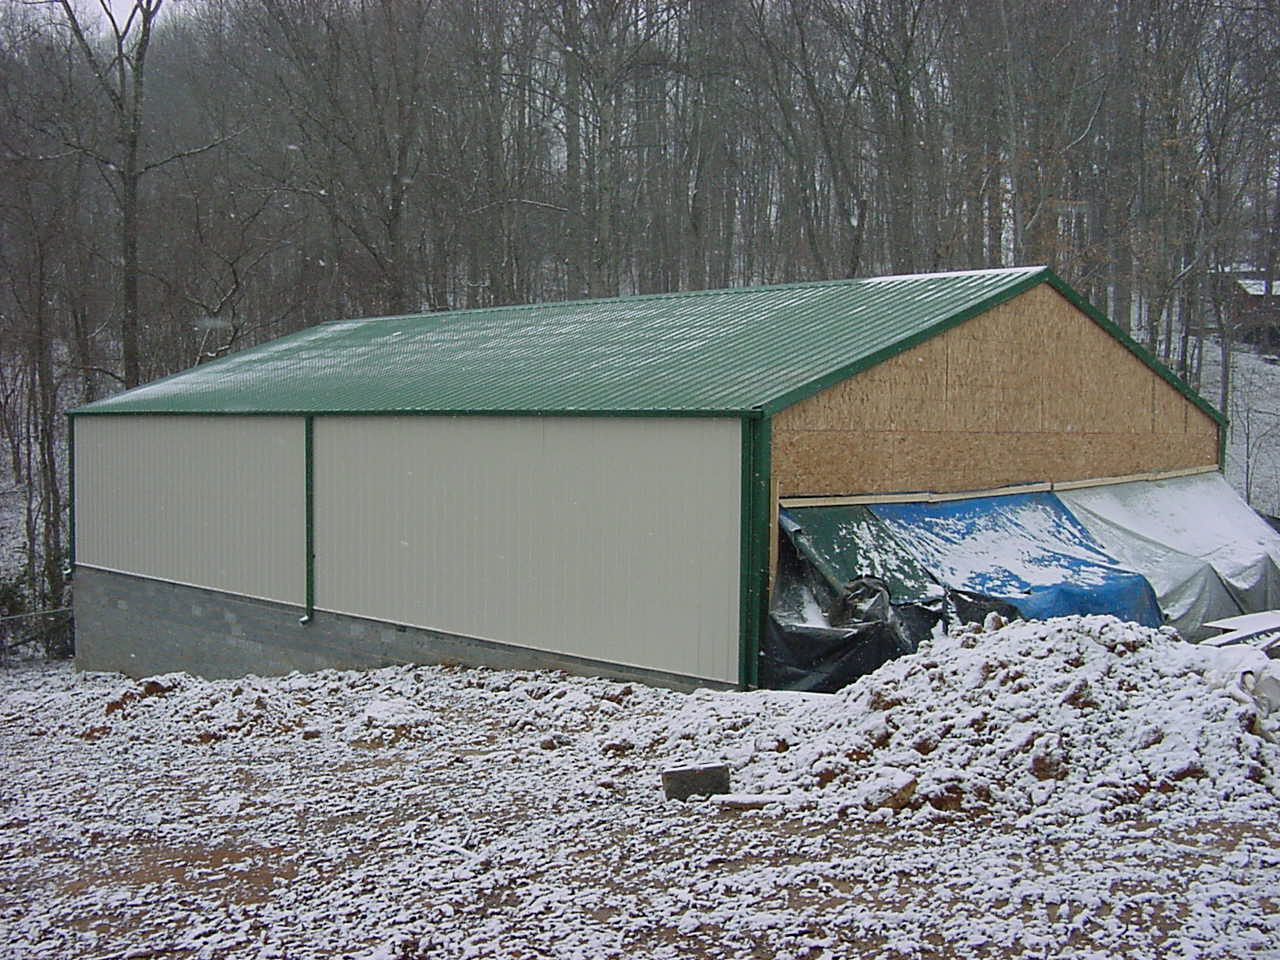
| It is really starting to look like
a garage now!! If we only had some siding on it.... |
 |
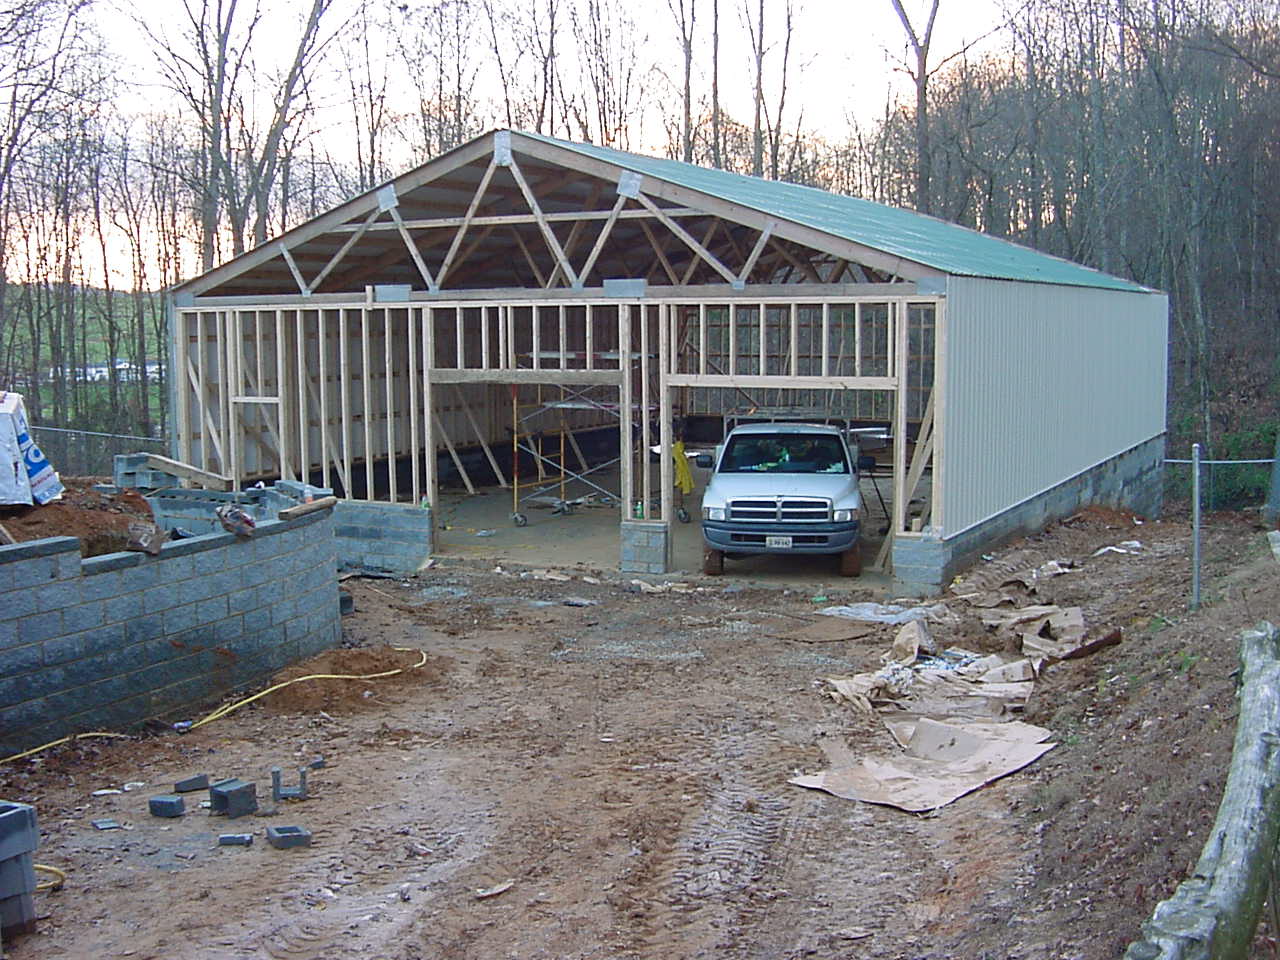
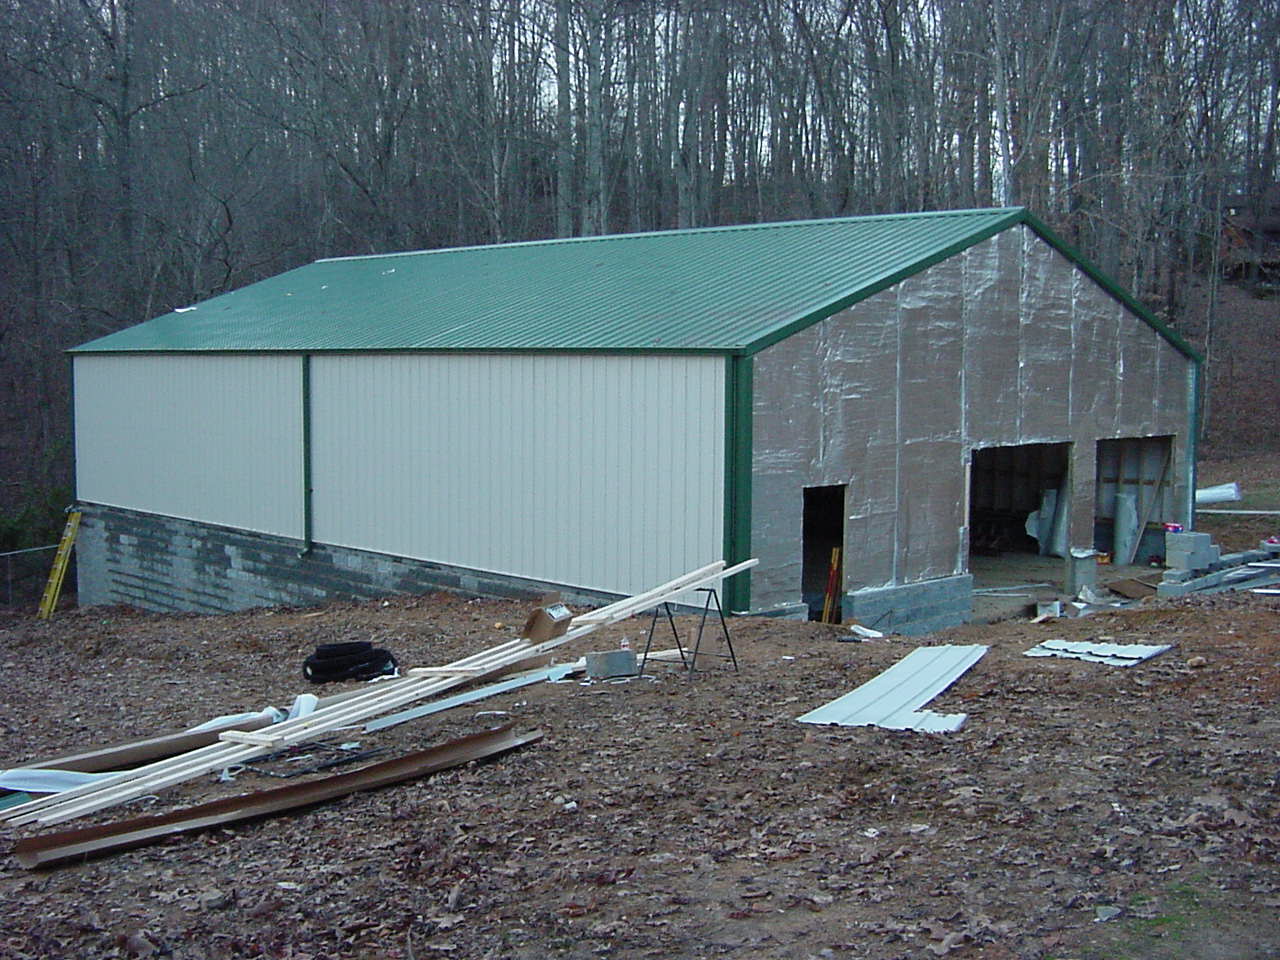
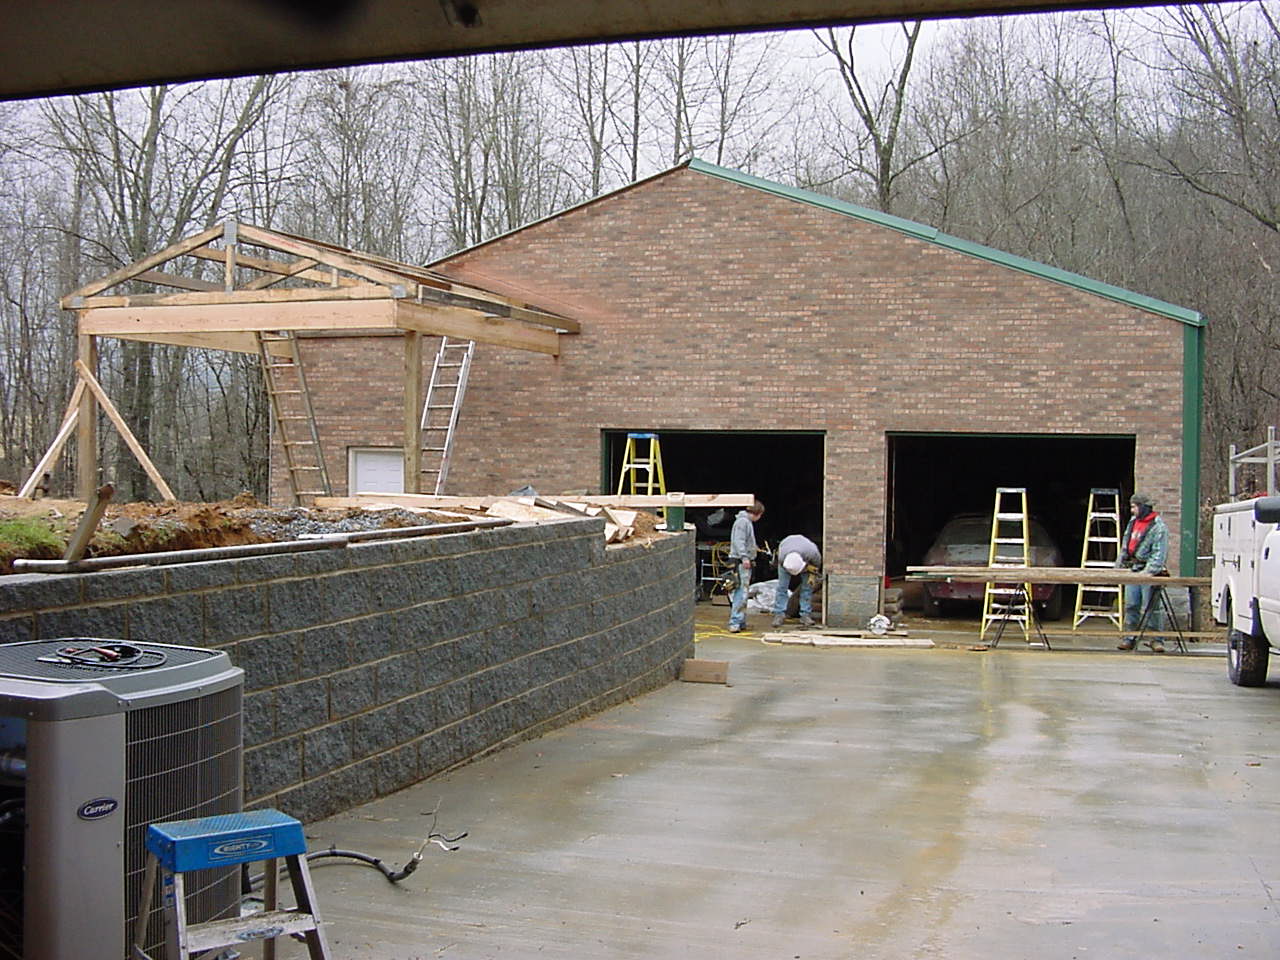
| MUCH BETTER!! Well the front wall is all framed
now and the roof and siding is being installed! |
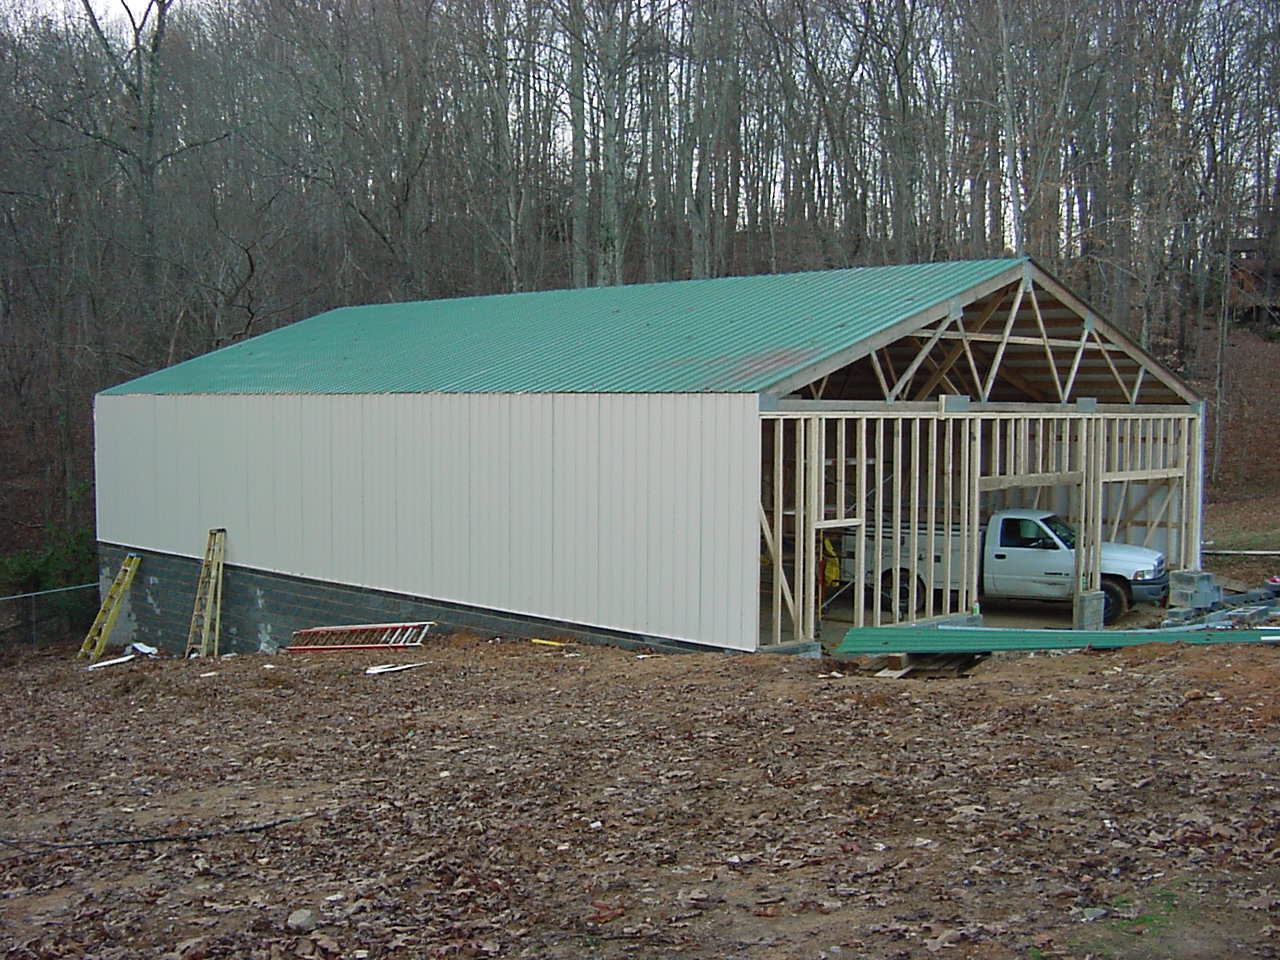 |
| You can see here that the front and
back wall both need to have the insulation and siding installed. The front wall will
also be bricked. The gutters and downspouts will need to be installed.
The doors also need to be installed. Then all that will be left will
be the front porch and the concrete apron... to finish the shell of the
building that is!! |
 |
| We're really getting close now!!
I need to get the fun stuff ordered now... the 2-post lift!! |
 |
| It won't be long until we can
finally work on getting the inside work (power, lights, etc.) so I can
actually start using it!! |
 |
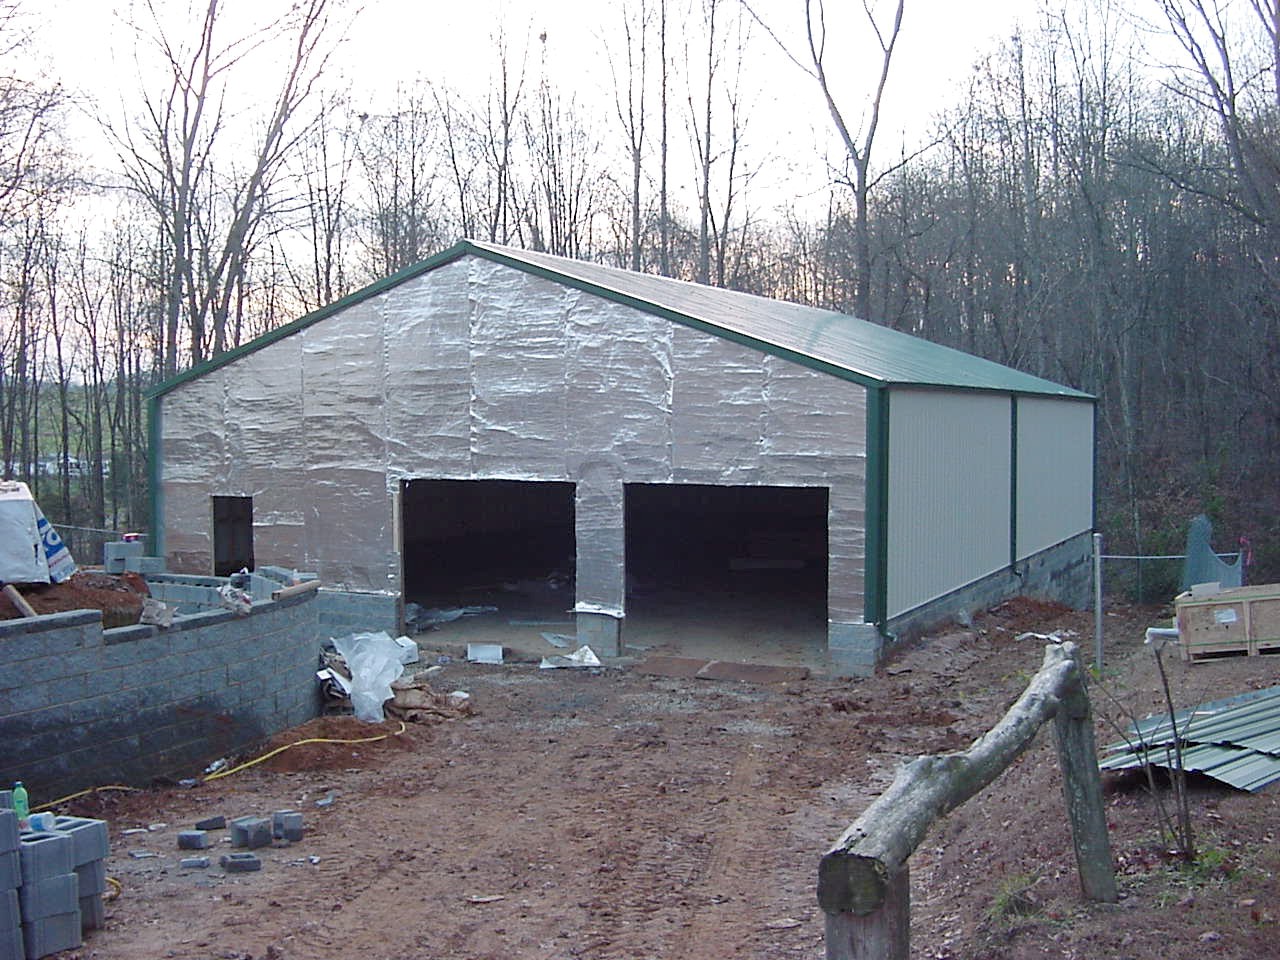
| Yep, that is SNOW all right.
I told you this project was taking a LONG time!! The plywood has been
put up on the front wall. The masons built a tent on the front so they
could go ahead and work on bricking the front wall in any weather. |
 |
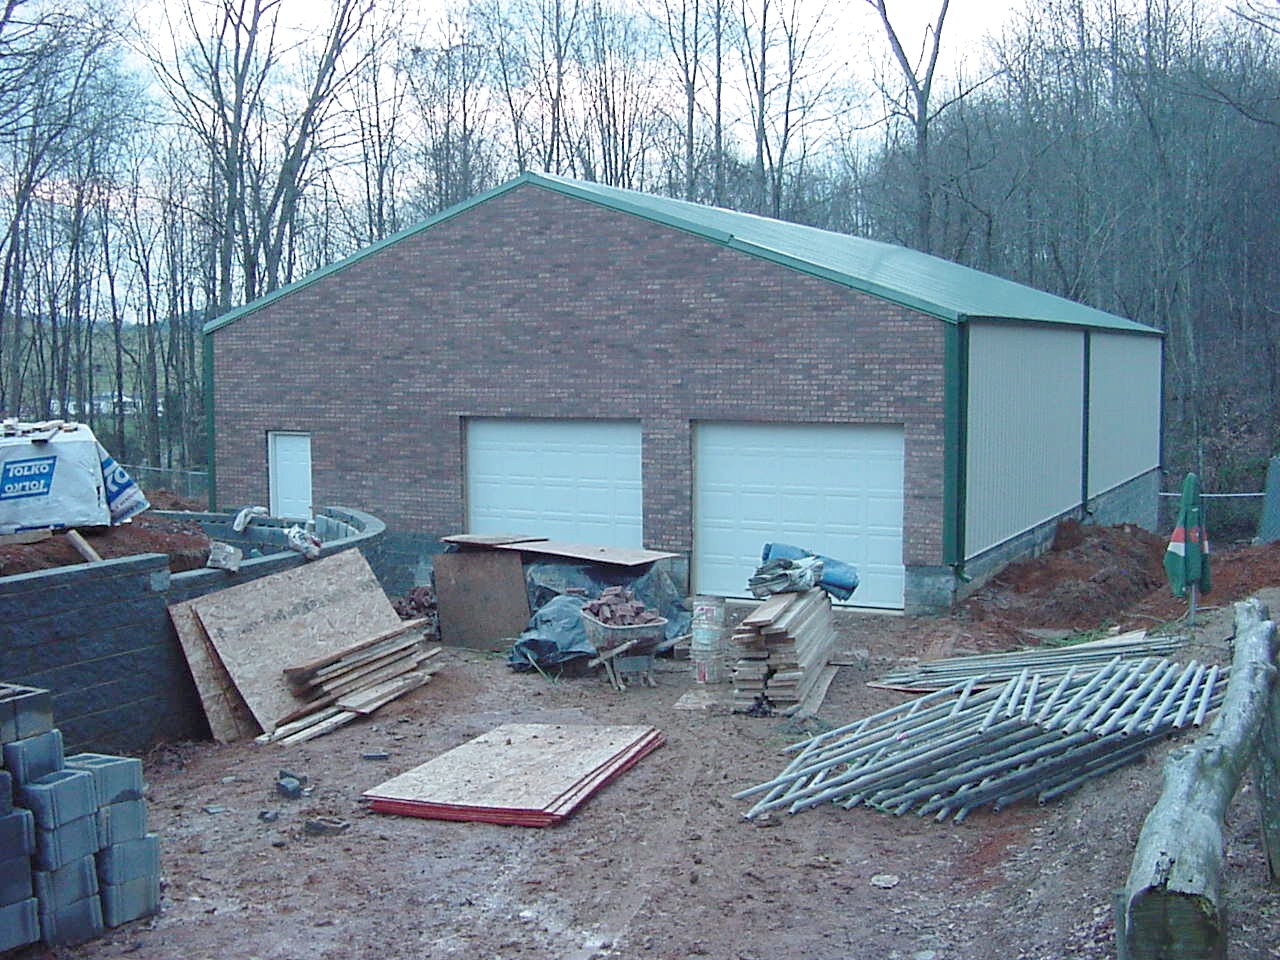
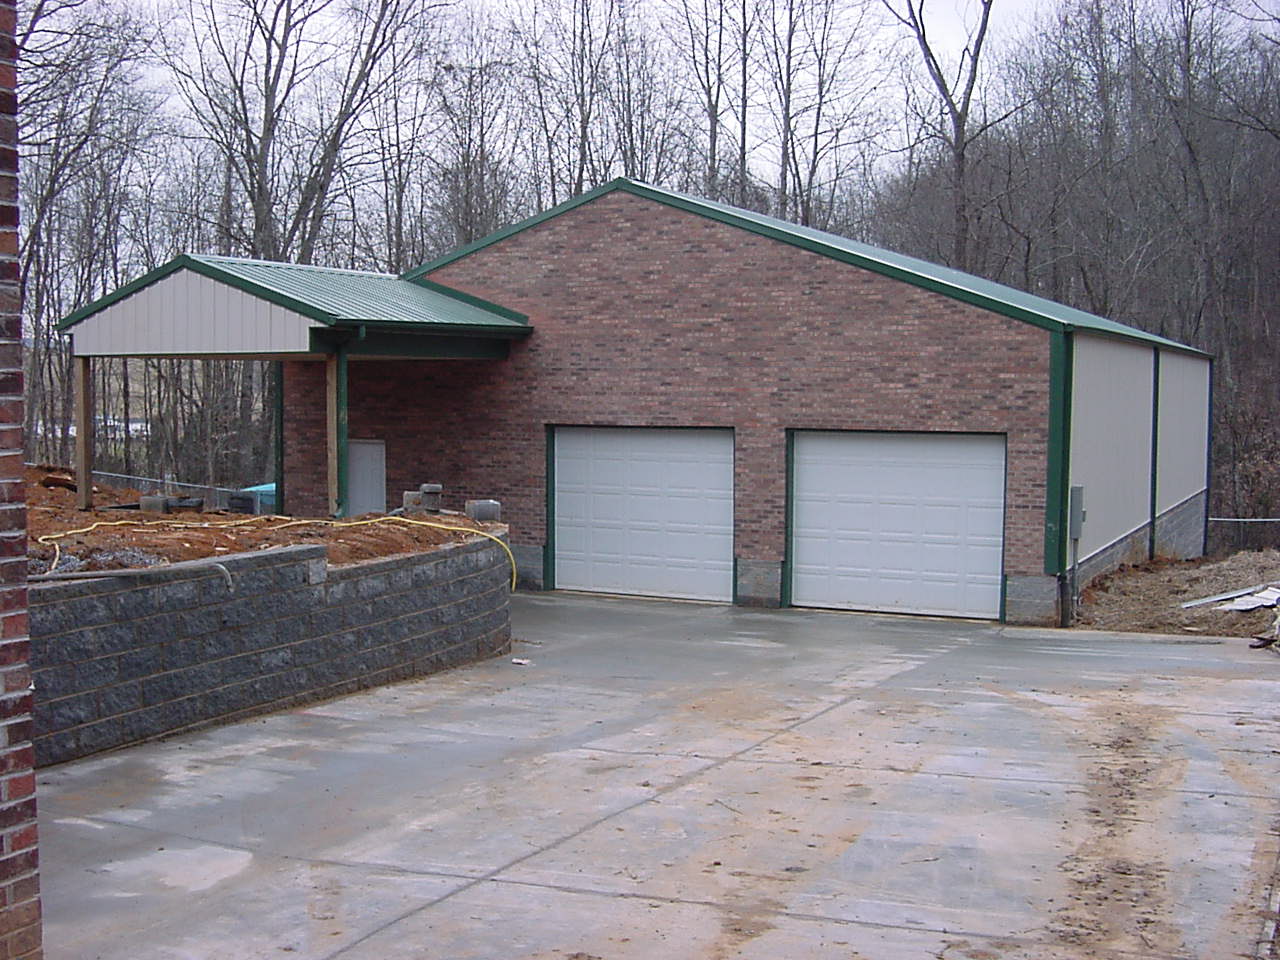
| The brick on the front is complete
and the doors have been installed. It is looking better!! |
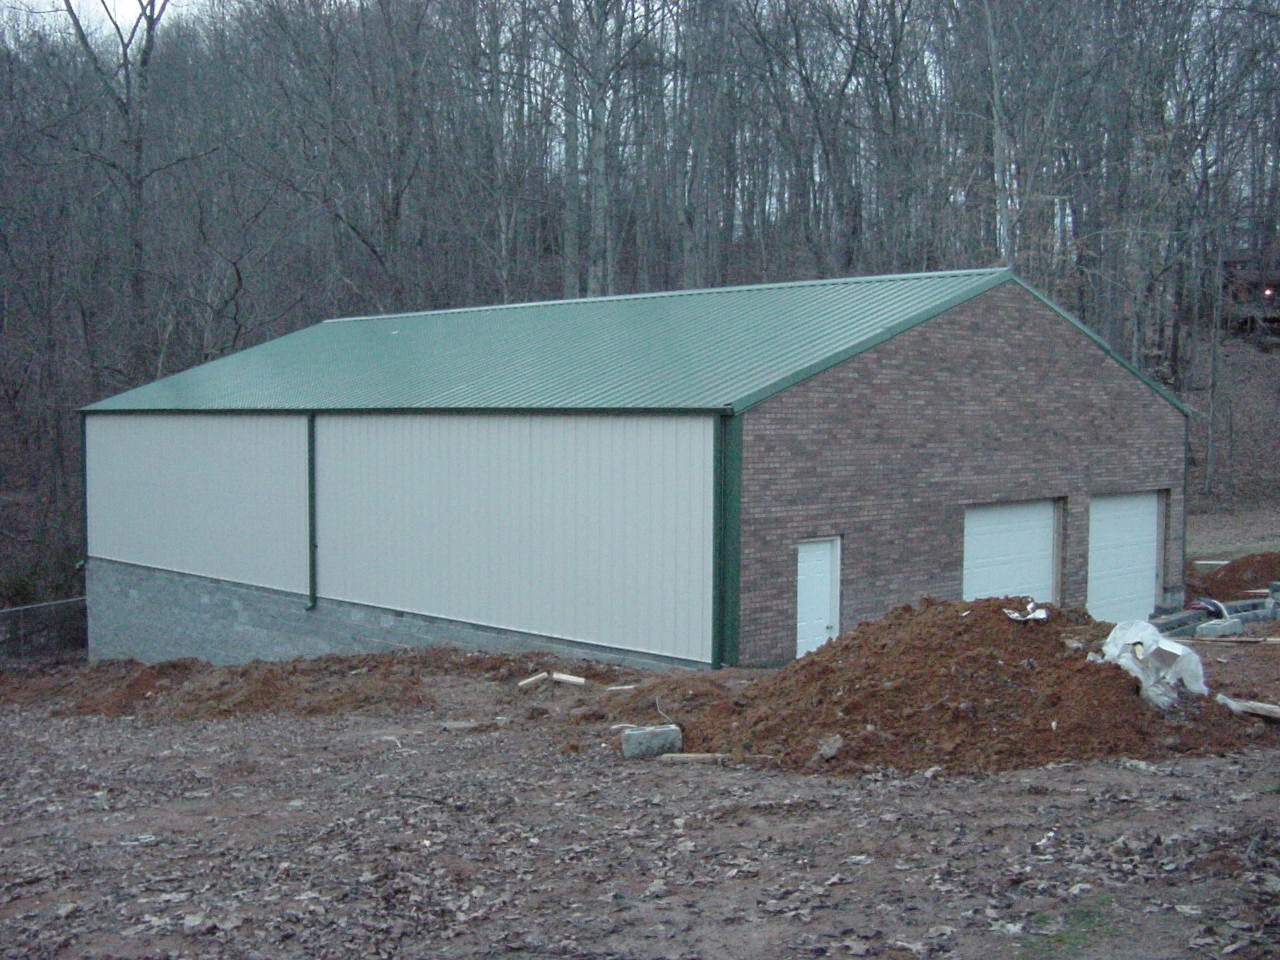 |
| We're almost ready to put the
15'X15' porch on the front and pour some more concrete! |
 |
| Update #9: Yep, we've got the
concrete truck back pouring the apron on the front of the garage. As
you can tell, we're still getting plenty of rain to generate plenty of mud!! |
 |
| As you can see the 15'X40' apron
has grown since our original design. We decided to pour concrete all
the way up to the rear of the house. You can also see in this picture
that we have power wiring installed!! Hopefully the porch will be
completed in just a few days... we've got to let the concrete set up for a
few days first. |
 |
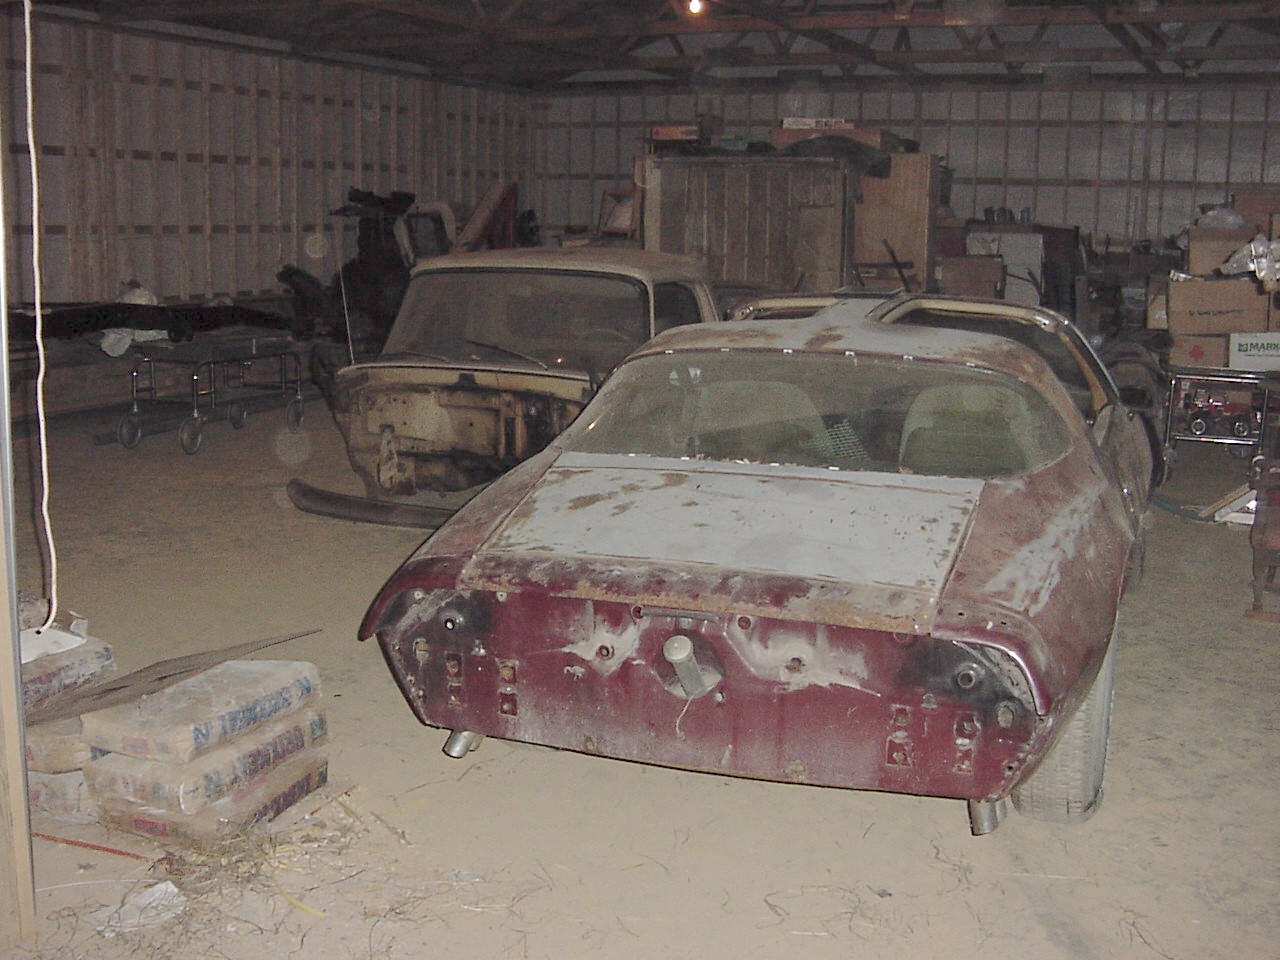
| It's MOVING day... time to move ALL
of the stuff that you remember seeing in my basement down to the new garage.
I've got to finish the basement of the house. Unfortunately, I've got
the empty the basement so it can be framed and finished, then move this
stuff around AGAIN to get my garage finished and organized. |
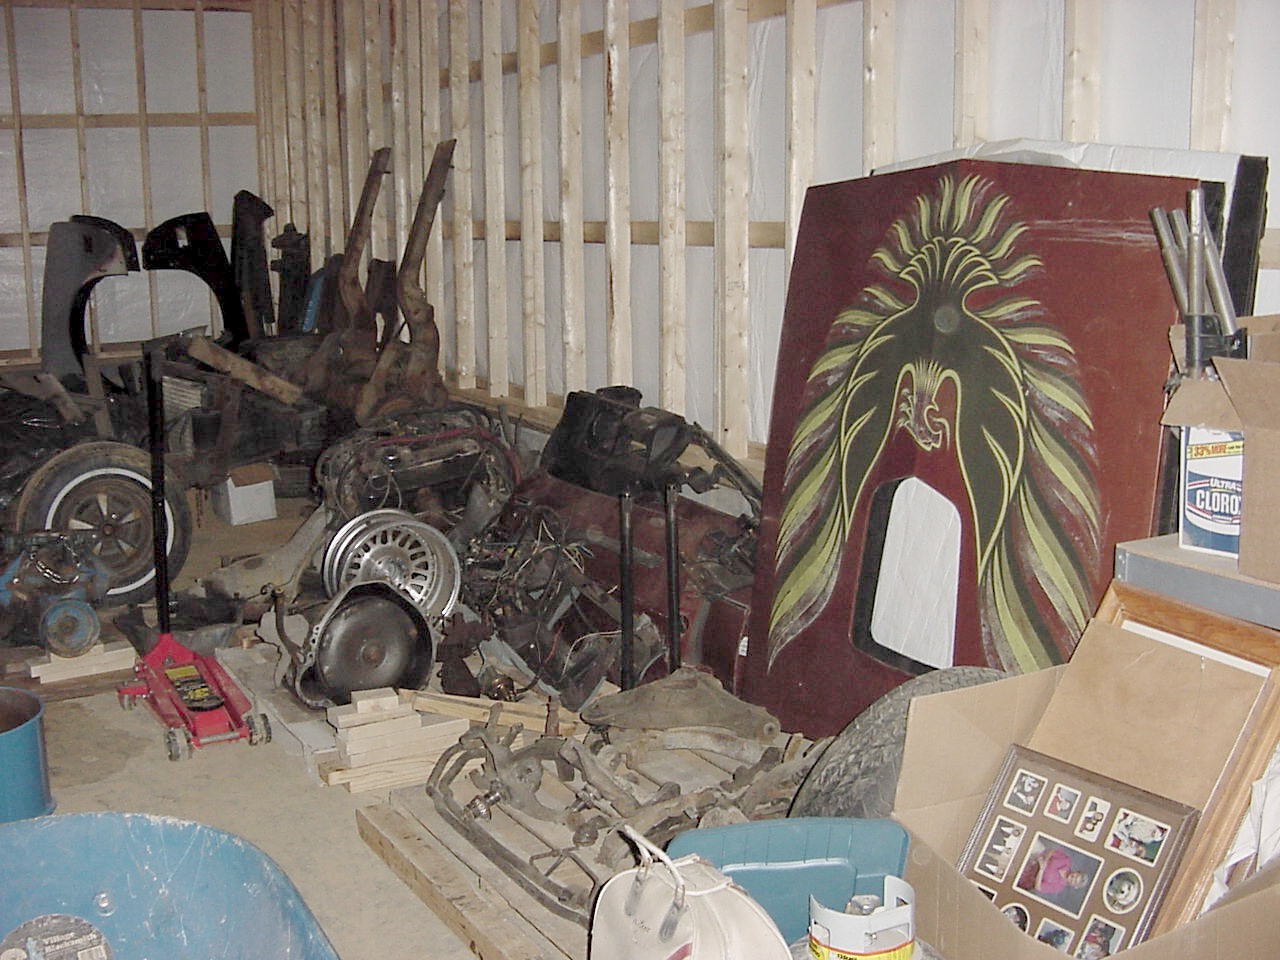 |
| Yep, my big honkin' garage is
pretty full. Thankfully a lot of the stuff out here will go back into
the house when it is finished. |
 |
|
|
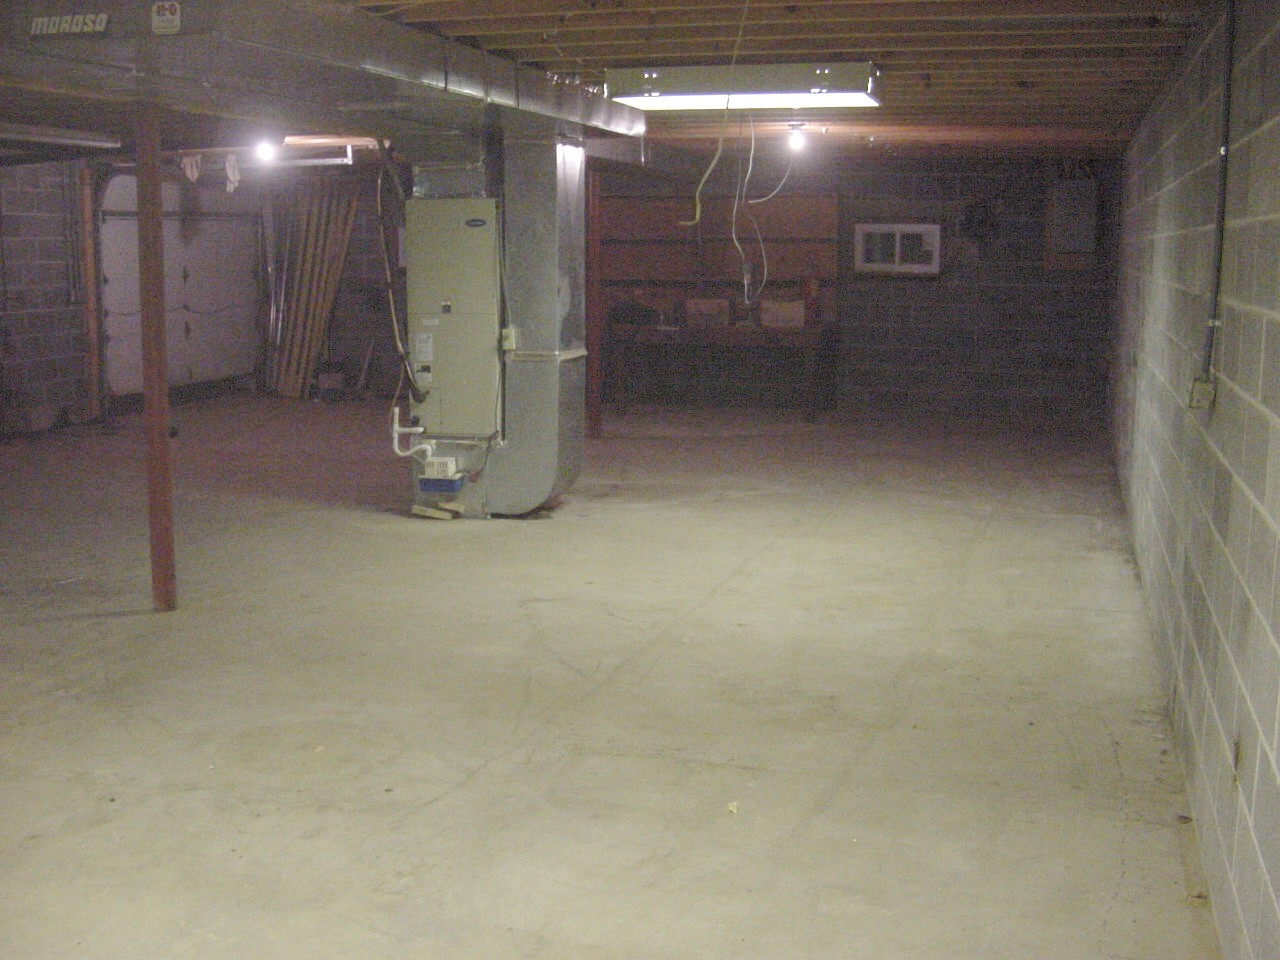 |
| Remember this picture? This
is what my basement USED to look like... |
This is what the basement looks
liked like for a few days. It hasn't looked like this in 14 years!!
It has since been completely finished into four rooms and a one-car garage. |
| Here you can see the 15X15 porch
under construction!! |
 |
| Here's the porch almost completed!!
The front support posts need to be finished and covered and some other small
details. |
 |
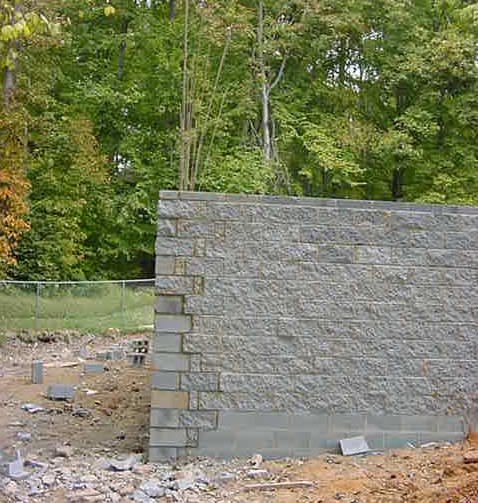
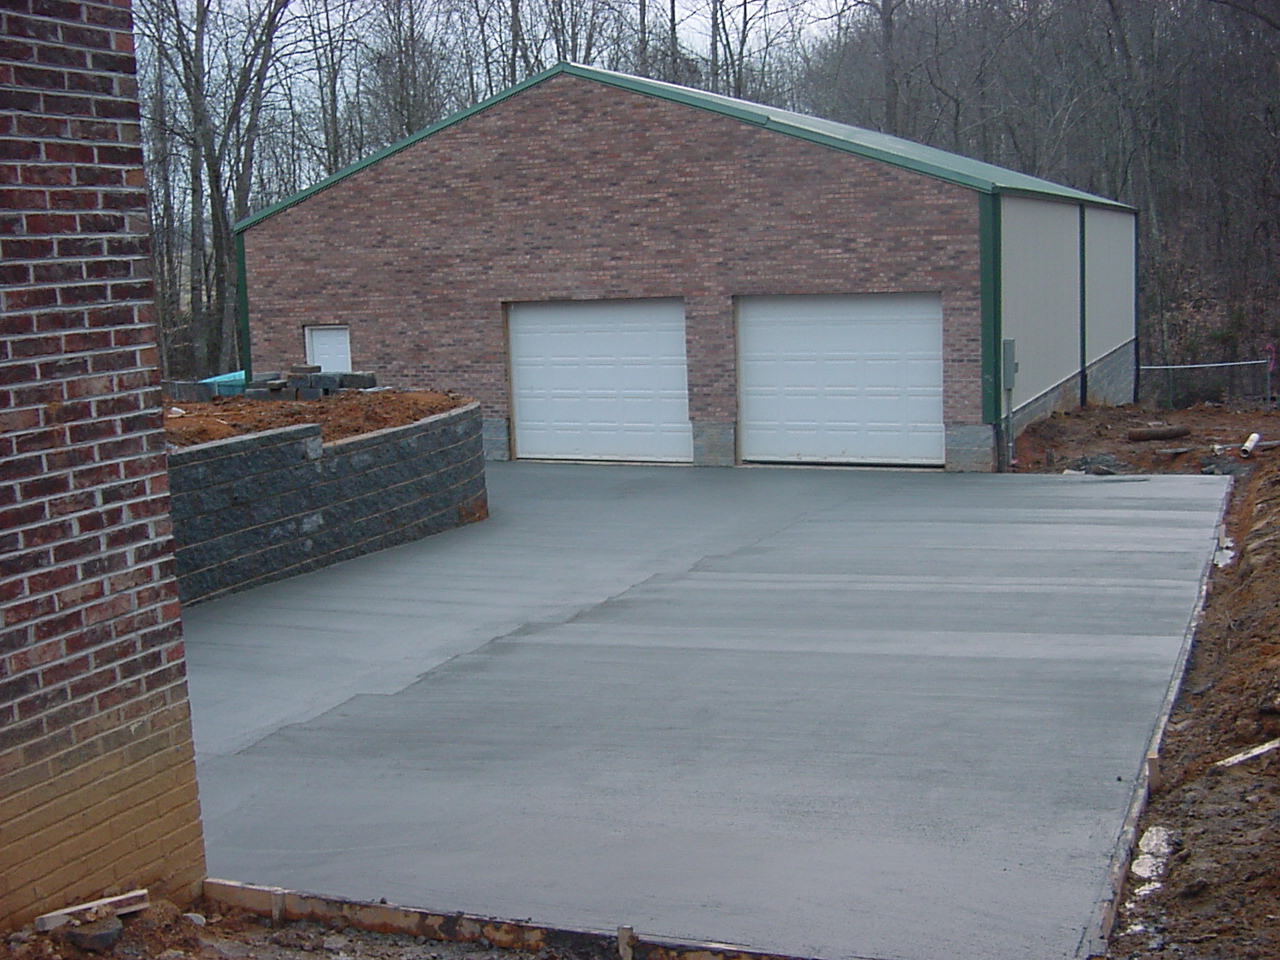
| The exterior of the new garage is
very close to completion. Just finish up some small details and stain
the cut face block and we'll be done! |
 |
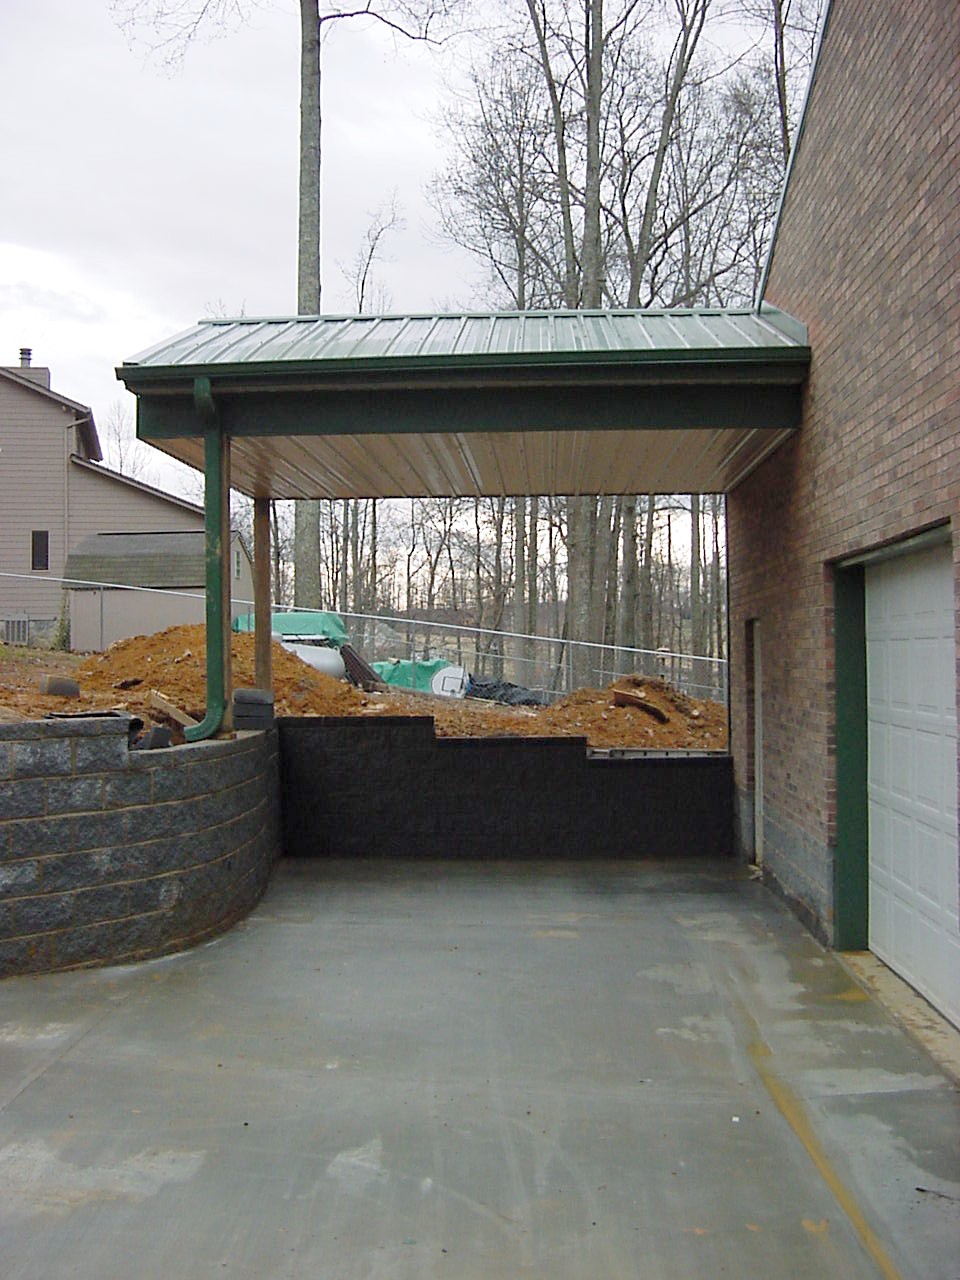
| Here's the almost completed porch
and retaining wall. The retaining wall will also be stained when the
cut face block on the garage is stained.
Some lights, lawnchairs, and some cool Trans Ams parked on the apron and
we'll be able to sit outside this Spring and enjoy the great outdoors!!
Notice the "drainage ditch" in front of the garage
door. My contractor designed this and said it has worked on other
projects he's built. This 30-foot long dip in the concrete led to a 4 inch
drain... |
 |
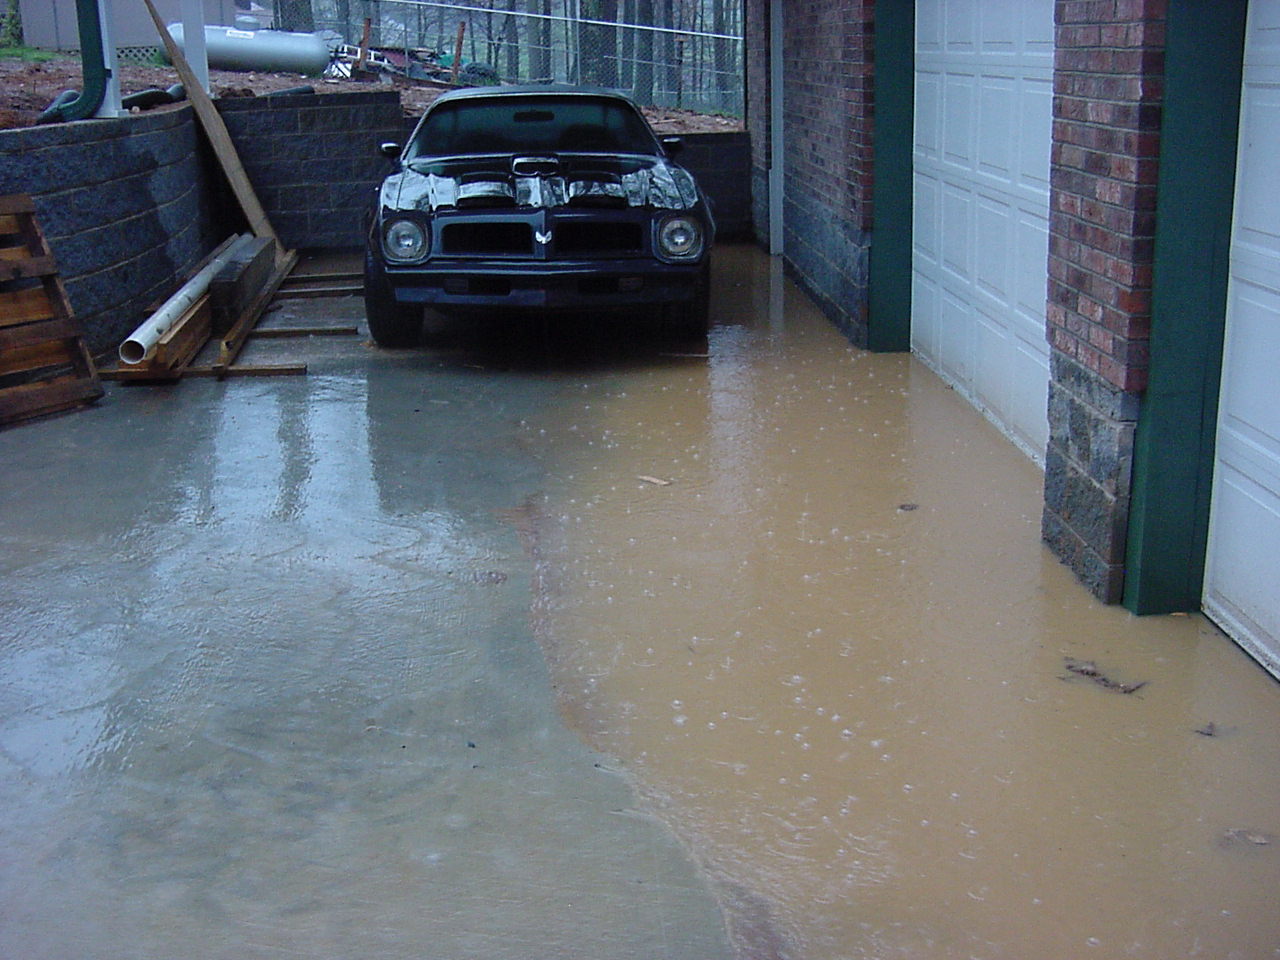
| ...then came the SPRING RAINS...
the little 4 inch drain would get a couple of leaves on top of the drain
grating... or get some dirt on the drain grating... or get ANYTHING on the
drain grating and you have instant FLOODED GARAGE. This happened FOUR
times!! I had water as far as 20 feet back inside and turned my
beautiful concrete floor into what looked like a dirt floor!!
The 4 inch drain feeds into a 6 inch drain and why
they didn't stub up a 6 inch drain I'll never know... |
 |
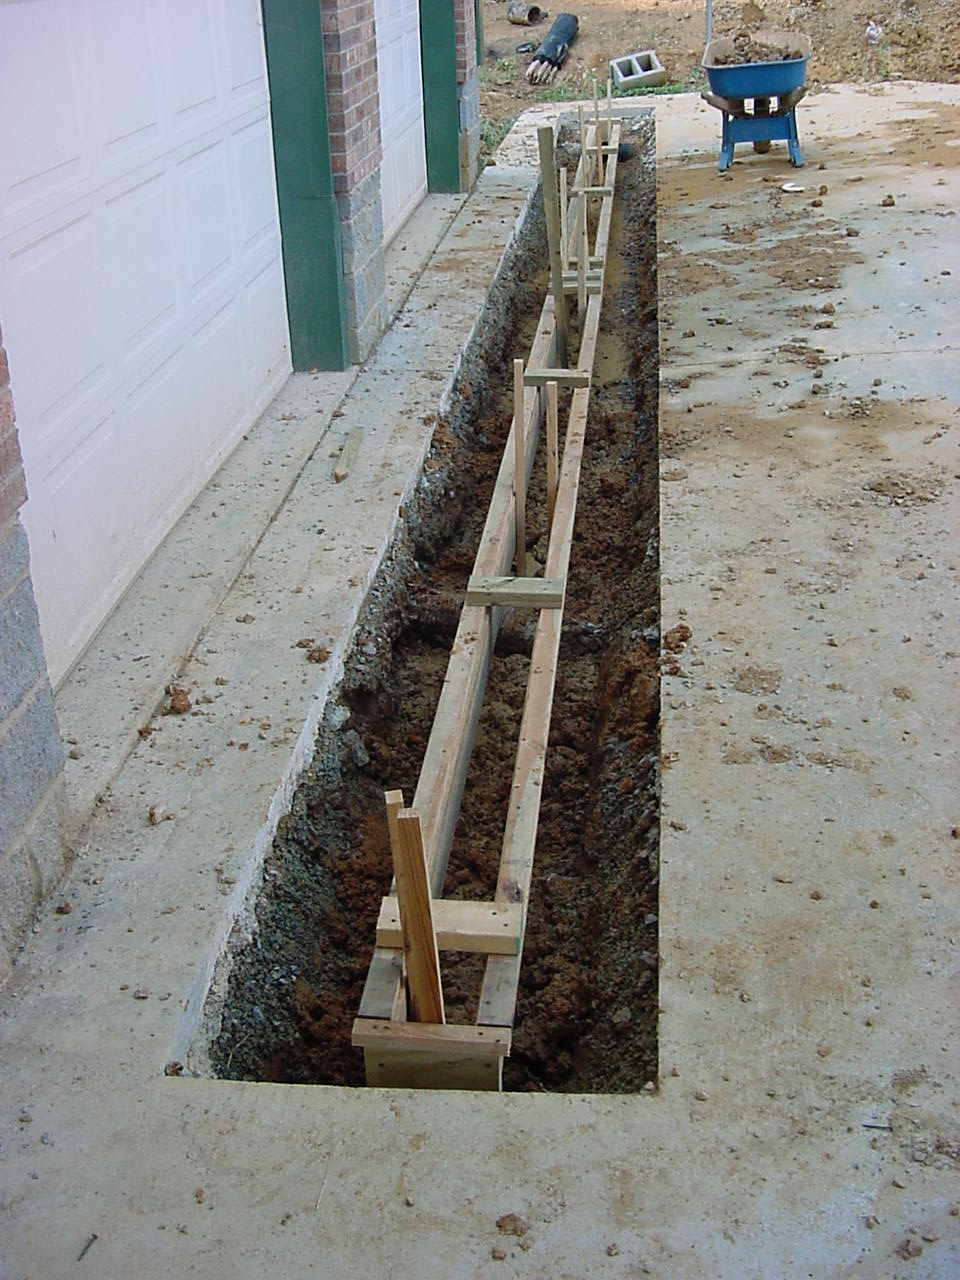
| The solution... cut my new concrete
apron, dig a trench, stub up a 6 inch drain, and build a concrete form for a
new 9 inch wide concrete trench that will feed the new 6 inch drain.
I'll cover the trench with aluminum grating. |
 |
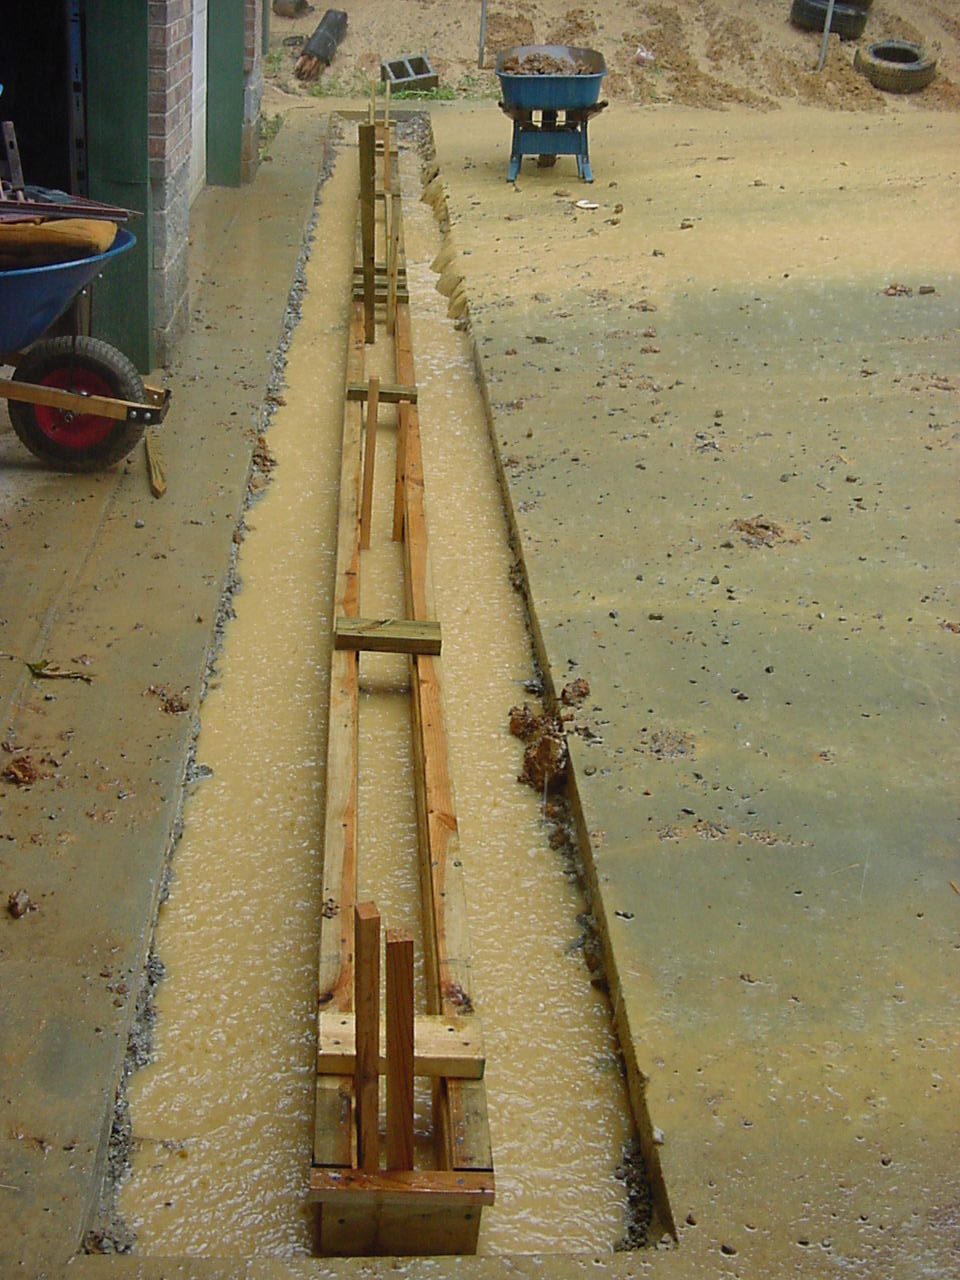
| Sounded like a good solution...
until the REALLY hard Summer thunderstorms and rains hit!! Check out
the "river" running down my concrete apron into this 30" wide X 18" deep X
30 foot long trench!! I walked behind the
garage to check the outlet of the 6 inch drain, and it was flowing all the
water it possibly could... |
 |
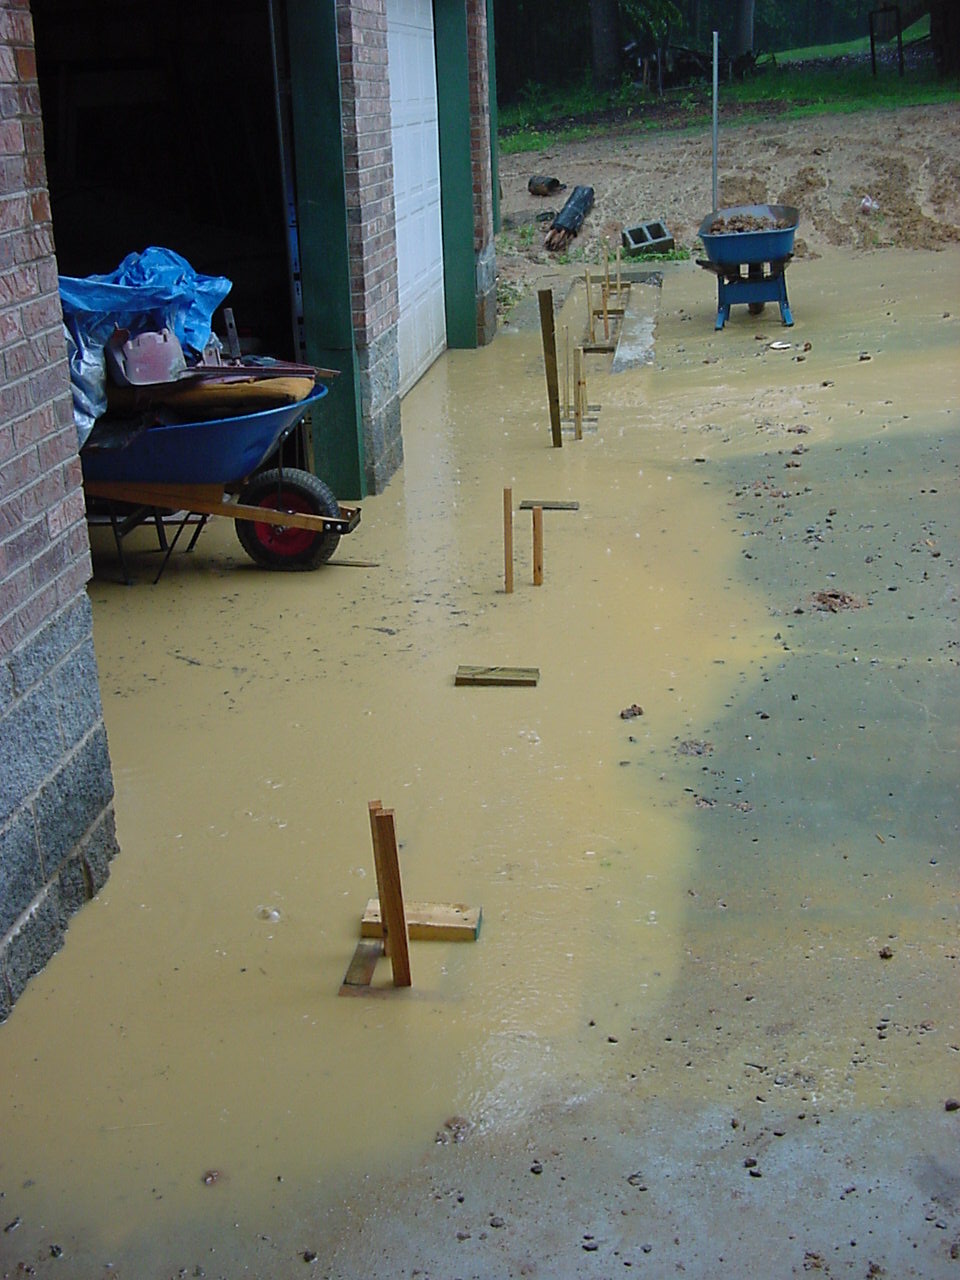
| Yep, FLOOD number 5 for the new
garage. I sure am glad I've not done any finish work on the inside
yet. |
 |
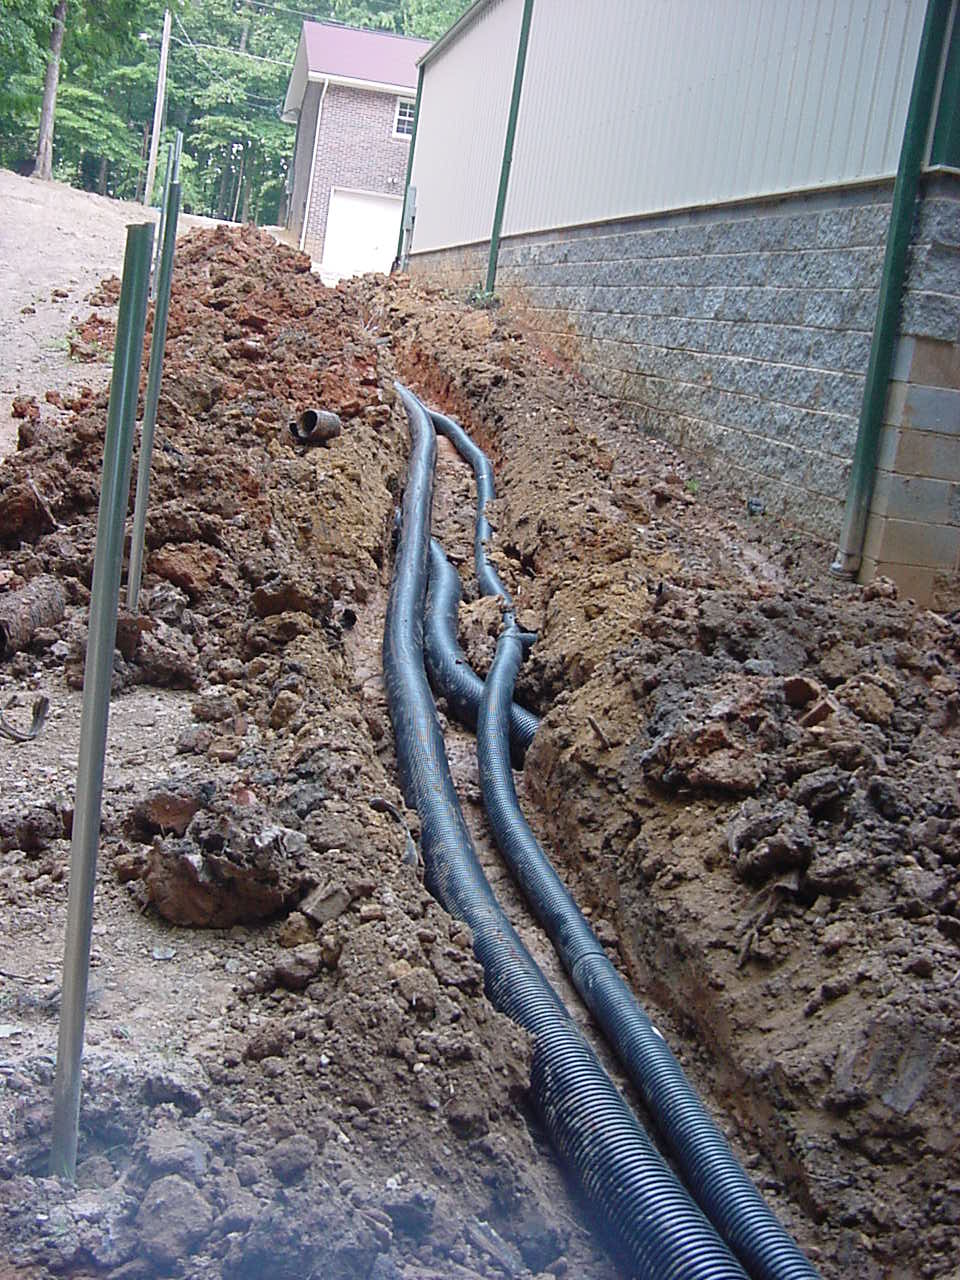
| So we installed TWO 6 inch drain
lines from the concrete trench to handle the water. We have had
opportunity to test this current configuration during a hard rain and it
works!! The 4 inch drain is for the gutters.
Now if we can only get the concrete poured to
finish the trench and get the aluminum grating cut to cover it... we'll be
in business!! |
 |
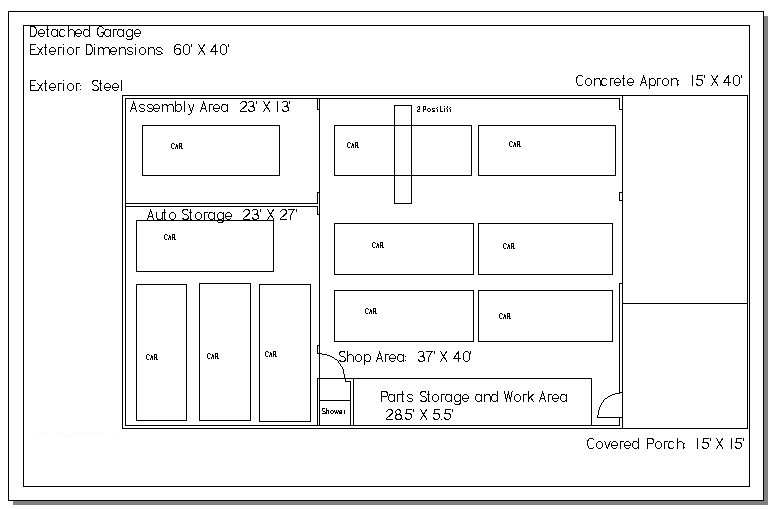
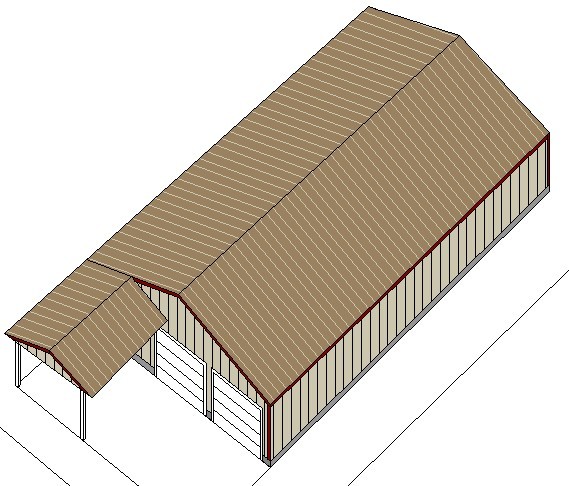
| Here's the building design!!
A 40' X 60' detached garage will be GREAT!! It will be a Posteel building.
It will have a 15' X 40' concrete apron and a 15' X 15' porch on the front. |
 |
| Here's the preliminary floor plan. |
|